Keeping your Shark robot vacuum clean is essential for its suction power and longevity. This ultimate guide provides a complete, step-by-step process for emptying the dust bin, cleaning the filters, removing hair from brushes, and wiping down sensors. Follow these simple maintenance routines to ensure your vacuum runs efficiently for years.
Contents
- 1 Key Takeaways
- 2 Ultimate Guide to Clean Your Shark Robot Vacuum
- 3 What You’ll Need
- 4 Step 1: Safety First & Preparation
- 5 Step 2: Empty the Dust Bin
- 6 Step 3: Clean the Filters
- 7 Step 4: Clean the Brushes
- 8 Step 5: Wipe Down Sensors and Charging Contacts
- 9 Step 6: Check the Wheels and Other Parts
- 10 Troubleshooting Common Issues
- 11 Conclusion: Establish a Simple Routine
- 12 Author
Key Takeaways
- Empty the Bin After Every Use: This prevents debris from clogging the system and maintains strong suction.
- Clean Filters Weekly: Gently tap out fine dust and rinse HEPA filters to trap allergens effectively.
- Remove Hair from Brushes Regularly: Use the included tool to cut and remove wrapped hair from the main brush roll and side brushes.
- Don’t Forget the Sensors and Charging Contacts: Wipe these with a dry cloth to ensure proper navigation and battery charging.
- Inspect the Wheels and Cliff Sensors: Clear any stuck debris to prevent mobility issues and navigation errors.
- Establish a Maintenance Schedule: Consistent, quick cleanings are more effective than occasional deep cleans.
- Use Genuine Shark Replacement Parts: For optimal performance, always replace worn filters and brushes with official Shark accessories.
Ultimate Guide to Clean Your Shark Robot Vacuum
Your Shark robot vacuum is a hardworking helper. But to keep it running like new, it needs a little care from you. A clean vacuum is a happy vacuum. It will have better suction, navigate your home smarter, and last much longer.
This guide will walk you through every part of the cleaning process. We will cover daily, weekly, and monthly tasks. You will learn how to handle the dust bin, filters, brushes, and all those important sensors. Let’s get started and give your robot the tune-up it deserves!
What You’ll Need
Gathering your supplies first makes the job easy. You likely have everything at home.
Visual guide about Ultimate Guide to Clean Your Shark Robot Vacuum
Image source: sharksvaccum.com
- A trash can
- A small brush or old toothbrush
- A dry, lint-free microfiber cloth
- Scissors or the cleaning tool that came with your Shark
- Lukewarm water
Step 1: Safety First & Preparation
Always put safety first when handling any electronic device.

Visual guide about Ultimate Guide to Clean Your Shark Robot Vacuum
Image source: robots.net
Turn Off and Unplug
Make sure your Shark robot vacuum is turned off. If it’s on its charging dock, unplug the dock from the wall outlet.
Work in a Well-Lit Area
Find a clear space with good light. A table or countertop is perfect. This helps you see all the small compartments and hidden debris.
Step 2: Empty the Dust Bin
This is the most important and frequent task. Do this after every cleaning cycle.
Visual guide about Ultimate Guide to Clean Your Shark Robot Vacuum
Image source: cdn.thewirecutter.com
Remove the Bin
Press the bin release button on your Shark robot vacuum. The dust bin will slide right out. Some models have a handle you lift.
Empty Debris into Trash
Hold the bin over your trash can. Open the lid or door on the bin. Shake it gently to get all the dirt, dust, and hair out. Give it a good tap.
Check the Bin Seal and Intake
Look at the rubber seal on the bin door. Wipe it with your dry cloth. Also, peek into the intake port on the vacuum where the bin sits. Use your small brush to clear any stuck debris there.
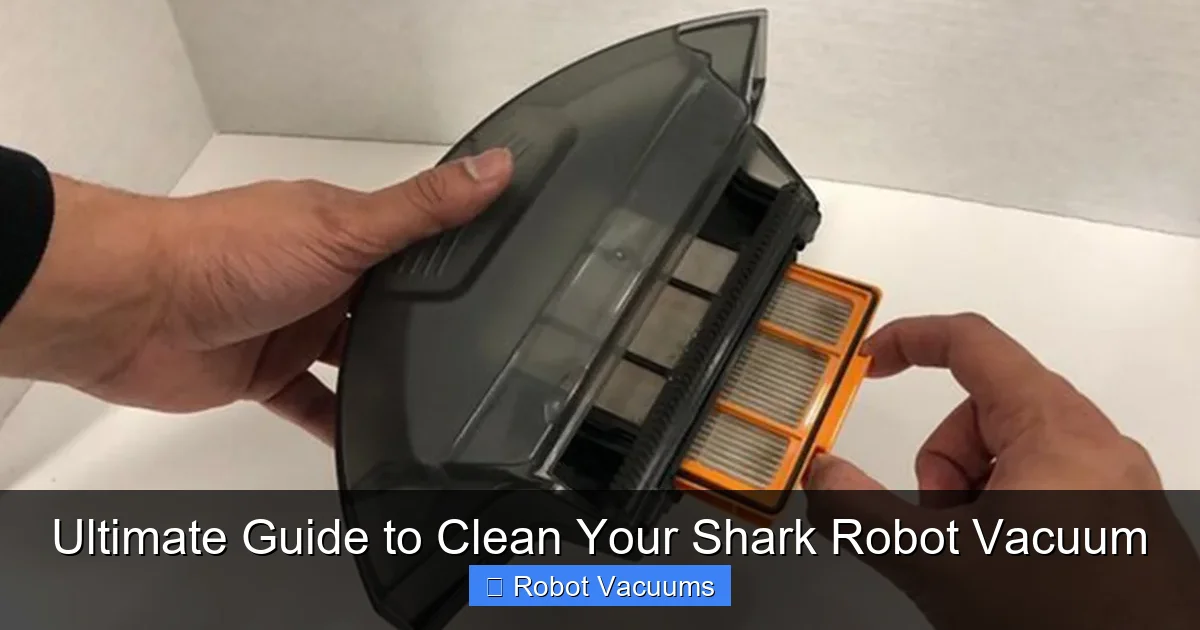
Step 3: Clean the Filters
Clogged filters are the number one cause of weak suction. Clean them at least once a week.
Locate and Remove the Filters
Open the dust bin. Inside, you will find the filter or set of filters. There is usually a foam filter and a HEPA filter. Gently lift them out.
Clean the Foam Filter
Tap the foam filter firmly against the inside of your trash can. This dislodges most of the fine dust. Do not rinse this filter with water unless your manual says it’s washable.
Clean the HEPA Filter
This is the main filter. Tap it even more firmly to remove dust. Most Shark HEPA filters are washable. Check your manual. If washable, rinse it under lukewarm water. Do not use soap. Let it air dry for a full 24 hours before putting it back.
Tip: Consider buying a second set of filters. You can use one set while the other dries. This keeps your vacuum always ready.
Step 4: Clean the Brushes
Hair and string love to wrap around brushes. This can stop them from spinning. Check these every two weeks.
Access the Brush Roll
Flip your Shark robot vacuum over. You will see a latch or clips holding a cover over the main brush roll. Open it to reveal the brush.
Remove the Brush Roll
Lift the end caps or press the release tabs to free the brush roll. Pull it straight out.
Cut and Remove Wrapped Debris
Use your scissors or the included Shark cleaning tool. Carefully cut the hair and threads wrapped around the brush. Pull them off. Use your small brush to clean between the bristles.
Clean the Side Brushes
These are the small spinning brushes on the sides. Pull them straight off their mounts. Remove any hair or debris. Wipe them clean with your cloth.
Clear the Brush Housing
Before putting the main brush back, look inside the empty housing. Use your brush or cloth to remove any dust or hair stuck in there.
Step 5: Wipe Down Sensors and Charging Contacts
Your robot “sees” with sensors. Dirty sensors cause bumping and getting lost.
Find the Sensors
Look for the cliff sensors on the underside. These are usually clear or black plastic windows. Find the front bumper sensor and any side sensors.
Gently Clean All Sensors
Dampen a corner of your microfiber cloth with water. Wring it out completely. Gently wipe each sensor window. Dry them immediately with the dry part of the cloth.
Clean the Charging Contacts
On the robot and the dock, you will see metal strips. These are the charging contacts. Wipe them with your dry cloth to remove any dust. This ensures a good connection for charging.
Step 6: Check the Wheels and Other Parts
A quick monthly check keeps everything moving smoothly.
Inspect the Wheels
Spin the front wheel and the two main drive wheels. Check for wrapped hair or string. Use your tool to pick out any debris.
Wipe the Exterior
Use your dry cloth to wipe down the entire body of the vacuum. This keeps it looking nice and removes dust that can get inside.
Troubleshooting Common Issues
If your Shark robot vacuum is acting up, a good clean often fixes it.
- Poor Suction: Empty the bin and clean the filters. This fixes it 90% of the time.
- Brush Not Spinning: Remove the main brush roll and clear any jammed hair or string.
- Getting Stuck or Bumping: Clean all sensors on the bumper and underside with a dry cloth.
- Not Charging Properly: Clean the metal charging contacts on both the robot and the dock.
- Error Beeps or Lights: Consult your manual. Often, it indicates a full bin or a clog. Go back to Step 2 and Step 4.
Conclusion: Establish a Simple Routine
Cleaning your Shark robot vacuum is simple. It takes just a few minutes. The key is consistency.
Make it a habit. Empty the bin after every run. Clean the filters every Saturday. Check the brushes every other week. Your robot will thank you with powerful, reliable cleaning for years to come. A little maintenance goes a long way. Now you have the ultimate guide to keep your helper in top shape. Happy cleaning!
🎥 Related Video: Essential maintenance tips for your Shark Robot vacuum
📺 Shark Home
A guide to keeping your Shark robot vacuum in top shape. Don’t forget to subscribe!