Plunging a toilet can sometimes cause an overflow if not done correctly. This guide provides step-by-step instructions to plunge safely and prevent water spillage. Learn essential tips and troubleshooting methods to handle clogs without mess, ensuring a clean and effective fix.
Contents
- 1 Key Takeaways
- 2 Can Plunging Overflow a Toilet? What You Need to Know
- 3 Understanding Toilet Overflows from Plunging
- 4 Step-by-Step Guide to Safe Plunging Without Overflow
- 5 What to Do If the Toilet Overflows While Plunging
- 6 Preventive Tips to Avoid Toilet Overflows from Plunging
- 7 Troubleshooting Common Plunging Issues
- 8 Conclusion
- 9 Author
Key Takeaways
- Plunging can cause overflow if done improperly: Excessive force or a poor seal may push water out of the bowl, leading to a mess.
- Use the right plunger for best results: A flange plunger is designed for toilets, creating a tight seal for effective plunging.
- Prepare the area to minimize mess: Lay down towels and wear gloves to protect against dirty water and slips.
- Apply correct plunging technique: Use firm, steady plunges with enough water in the bowl to cover the plunger head.
- Know when to stop and call a plumber: If plunging doesn’t work after 10-15 attempts, it may indicate a deeper clog requiring professional help.
- Clean up effectively if overflow occurs: Use disinfectants and proper cleaning supplies to sanitize the area and prevent health risks.
- Preventive measures avoid future clogs: Avoid flushing non-flushable items and perform regular maintenance to keep toilets flowing smoothly.
Can Plunging Overflow a Toilet? What You Need to Know
Have you ever faced a clogged toilet and reached for a plunger, only to worry about water spilling over? You’re not alone. Many people wonder if plunging can overflow a toilet. The short answer is yes, but only if you do it wrong. This guide will walk you through everything you need to know about plunging without causing a flood. We’ll cover safe techniques, troubleshooting, and how to handle overflows if they happen. By the end, you’ll feel confident tackling toilet clogs like a pro.
Plunging is a common DIY fix for toilet clogs. But improper plunging can push water out of the bowl, creating a messy overflow. This usually happens when you use too much force, have a weak seal, or the clog is severe. Understanding these risks is key to preventing them. In this how-to guide, we’ll dive into step-by-step instructions for safe plunging. We’ll also share practical tips to keep your bathroom dry. Let’s get started!
Understanding Toilet Overflows from Plunging
Before you plunge, it’s helpful to know why overflows occur. A toilet overflow from plunging often stems from physics. When you plunge, you create pressure in the drainpipe. If the clog is tight, that pressure has nowhere to go but back up into the bowl. If the bowl is too full, water can splash over the rim. Another cause is using the wrong plunger or technique. For instance, a cup plunger meant for sinks might not seal well in a toilet, allowing air and water to escape. Also, if you plunge too aggressively, you can force water upward. Knowing these factors helps you avoid mistakes.
Visual guide about Can Plunging Overflow Toilet What You Need to Know
Image source: mybathroomspace.com
Most toilet overflows during plunging are preventable. By learning the right methods, you can clear clogs safely. This guide focuses on practical steps to minimize risks. We’ll emphasize preparation and gentle, effective plunging. Remember, the goal is to dislodge the clog, not create a bigger problem. With patience and the right approach, you can often fix a clog without any overflow.
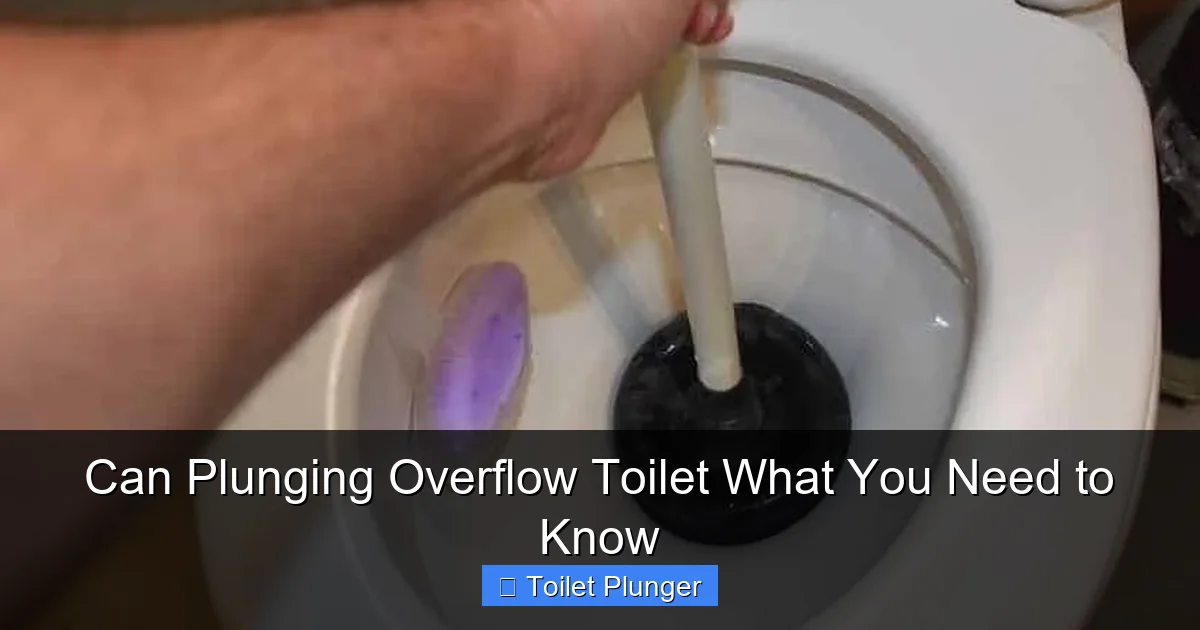
Step-by-Step Guide to Safe Plunging Without Overflow
Follow these steps to plunge your toilet safely and avoid overflows. This process is designed to maximize efficiency while keeping water in the bowl.

Visual guide about Can Plunging Overflow Toilet What You Need to Know
Image source: i.ytimg.com
Step 1: Gather Your Supplies
Before you start, collect what you need. This includes a flange plunger (best for toilets), rubber gloves, old towels, a bucket, and disinfectant. Having everything ready saves time and reduces mess. Wear gloves to protect your hands from germs. Place towels around the toilet base to catch any splashes. This simple prep can make a big difference if water spills.
Step 2: Check the Water Level
Look at the water in the toilet bowl. If it’s very high, close to the rim, remove some water to prevent overflow. Use a small cup or bucket to scoop water into a larger bucket. Aim to lower the level so it’s about halfway up the bowl. This gives room for plunging without splashing. If the water is low, add some from the sink to cover the plunger head. Proper water level is crucial for creating suction.
Step 3: Create a Tight Seal
Insert the plunger into the bowl at an angle. Make sure the rubber flange (the extended part) fits into the drain hole at the bottom. Press down gently to force out air and form a seal. The plunger should be fully submerged in water. A good seal ensures pressure goes toward the clog, not back into the bowl. If you hear gurgling, adjust the plunger until it’s snug.
Step 4: Plunge with Steady Rhythm
Now, push and pull the plunger handle firmly but not too hard. Use slow, steady motions. Start with gentle plunges to build pressure. Then, increase force gradually. Aim for 10-15 plunges per attempt. Avoid jerky movements, as they can break the seal and cause splashing. If water rises, pause and let it settle. This method helps dislodge clogs without forcing water over the rim.
Step 5: Test the Flush
After plunging, gently pull the plunger out and set it aside. Try flushing the toilet once. If water drains normally, the clog is cleared. If it still drains slowly or backs up, repeat plunging. But don’t overdo it—if after two or three attempts nothing changes, stop to avoid overflow risks. Sometimes, clogs need more than plunging.
Step 6: Clean Up
Once the clog is gone, clean the plunger and area. Use disinfectant on the toilet and floor. Wash your gloves and hands thoroughly. Proper cleanup prevents stains and keeps your bathroom hygienic. If you used towels, launder them with hot water. This step is often overlooked but important for health.
What to Do If the Toilet Overflows While Plunging
Even with care, overflows can happen. Don’t panic! Here’s how to handle it quickly and safely.
Visual guide about Can Plunging Overflow Toilet What You Need to Know
Image source: img.thrfun.com
First, stop plunging immediately. Grab towels to soak up water on the floor. Use a bucket or cup to remove excess water from the bowl if it’s still rising. Then, locate the toilet’s water shut-off valve—usually behind or near the toilet—and turn it clockwise to stop water flow. This prevents more water from entering the bowl. Once controlled, clean the area with disinfectant to sanitize. Wear gloves throughout to avoid contact with waste water. After cleaning, assess the clog. You may need to try plunging again later or call a plumber. Remember, safety comes first; slips and germs are real risks with overflows.
Preventive Tips to Avoid Toilet Overflows from Plunging
Prevention is better than cure. Use these tips to reduce the chance of overflow when plunging.
- Use a flange plunger: This type is designed for toilets, with a rubber flap that seals better than cup plungers.
- Plunge gently: Start soft and increase force slowly. Rushing can cause splashes.
- Maintain your toilet: Avoid flushing wipes, paper towels, or hygiene products. Stick to toilet paper and waste.
- Regular checks: If your toilet clogs often, have a plumber inspect it for deeper issues like pipe blockages.
- Keep a plunger handy: Store one in every bathroom for quick access, so you’re prepared.
These simple habits can save you from messy overflows. They also extend the life of your plumbing system.
Troubleshooting Common Plunging Issues
Sometimes, plunging doesn’t go as planned. Here are common problems and solutions.
Problem: Water Rises Too Fast During Plunging
If water rises quickly, you might be plunging too hard or have a severe clog. Stop and let water recede. Remove some water from the bowl before trying again. Use slower plunges. If it persists, the clog may be deep—consider using a toilet auger or calling a pro.
Problem: No Suction or Seal
This often means the plunger is wrong or worn out. Check that you’re using a flange plunger and it’s fully submerged. Replace old plungers with cracked rubber. Ensure the flange is extended and seated in the drain.
Problem: Clog Returns After Plunging
If the toilet flushes fine but clogs again soon, there could be a partial blockage or buildup in the pipes. Try plunging again with more force, or use a chemical drain cleaner (carefully, following instructions). For recurring issues, a plumber can snake the drain.
Troubleshooting helps you adapt when things go wrong. Stay calm and methodical for best results.
Conclusion
Plunging a toilet doesn’t have to lead to overflow. With the right knowledge and techniques, you can clear clogs safely and efficiently. This guide has shown you how to prepare, plunge step-by-step, handle overflows, and prevent future problems. Remember, use a flange plunger, maintain a steady rhythm, and don’t force it. If all else fails, don’t hesitate to call a plumber. By following these tips, you’ll keep your bathroom clean and functional. Happy plunging!