Using a toilet plunger correctly is key to resolving clogs efficiently and preventing plumbing issues. This guide provides clear, step-by-step instructions on the proper technique, from preparation to cleanup. You’ll learn how to master plunging for success in any clog situation with confidence.
Contents
- 1 Key Takeaways
- 2 Introduction: Why Mastering the Toilet Plunger Matters
- 3 Step 1: Gather Your Supplies
- 4 Step 2: Prepare the Toilet and Area
- 5 Step 3: Position the Plunger Correctly
- 6 Step 4: Execute the Plunging Motion
- 7 Step 5: Check for Success
- 8 Step 6: Clean Up Afterward
- 9 Troubleshooting: When the Toilet Plunger Doesn’t Work
- 10 Conclusion: Become a Toilet Plunger Pro
- 11 Author
Key Takeaways
- Choose the right plunger: Always use a flange plunger designed for toilets, as it creates a better seal in the drain than a standard cup plunger.
- Prepare thoroughly: Wear rubber gloves and lay down towels to protect against spills, ensuring a clean and safe plunging process.
- Achieve a tight seal: Position the plunger completely over the drain hole and submerge it in water to form an airtight seal for effective pressure.
- Use proper plunging motion: Push down firmly and pull up vigorously without breaking the seal, repeating 15-20 times to dislodge clogs.
- Be patient and persistent: Stubborn clogs may require multiple attempts; avoid rushing and test the flush after each plunging session.
- Clean up properly: Disinfect the toilet plunger and surrounding area with bleach or disinfectant to maintain hygiene after use.
- Know when to escalate: If plunging fails after several tries, consider using a toilet auger or calling a professional plumber to avoid damage.
Introduction: Why Mastering the Toilet Plunger Matters
A clogged toilet is a common household headache. It can cause stress, mess, and even costly plumbing repairs if handled wrong. But with the right know-how, you can tackle it like a pro. The humble toilet plunger is your first line of defense. Yet, many people use it incorrectly, leading to frustration and bigger problems. This guide will teach you the correct way to use a toilet plunger. You’ll learn step-by-step methods, practical tips, and troubleshooting advice. By the end, you’ll master this essential skill and save time, money, and embarrassment. Let’s dive in!
Step 1: Gather Your Supplies
Before you start, having the right tools on hand makes all the difference. This step ensures you’re prepared for a smooth plunging experience.
Visual guide about Master the Correct Way to Use a Toilet Plunger
Image source: i.pinimg.com
Choose the Right Toilet Plunger
Not all plungers are created equal. For toilets, always use a flange plunger. It has a soft rubber cup with an extended flange (a funnel-like piece) that fits snugly into the toilet drain. This design creates a tight seal, which is crucial for generating the suction and pressure needed to clear clogs. A standard cup plunger, meant for sinks and flat surfaces, won’t work well in toilets. Investing in a good-quality toilet plunger is key to success.
Other Essential Items
Besides the toilet plunger, gather these supplies:
- Rubber gloves: Protect your hands from germs and water.
- Old towels or rags: Place them around the toilet base to catch any splashes.
- Bucket of warm water: Useful for adding water if the toilet bowl is low.
- Disinfectant or bleach: For cleaning up after the job is done.
- Trash bag: To dispose of any messy materials safely.
Having these items ready will help you stay organized and hygienic.
Step 2: Prepare the Toilet and Area
Preparation minimizes mess and sets you up for effective plunging. Take a few minutes to get everything in order.

Visual guide about Master the Correct Way to Use a Toilet Plunger
Image source: i.ytimg.com
Clear the Surroundings
Move any bathroom rugs, mats, or items near the toilet. This gives you space to work and prevents them from getting wet. Lay down towels around the toilet base to absorb any water that might spill during plunging. If you have a bathroom fan or window, open it for ventilation.
Protect Yourself with Gloves
Put on your rubber gloves before touching anything. This is a basic hygiene practice that shields you from bacteria and waste. Also, consider wearing old clothes in case of splashes.
Check the Water Level
Look at the toilet bowl. For a toilet plunger to work well, you need enough water to cover the rubber cup. If the water is too low, slowly add warm water from a bucket until it’s about halfway up the bowl. Avoid overfilling, as this can cause overflow when you plunge. If the bowl is very full, use a small cup to remove some water carefully.
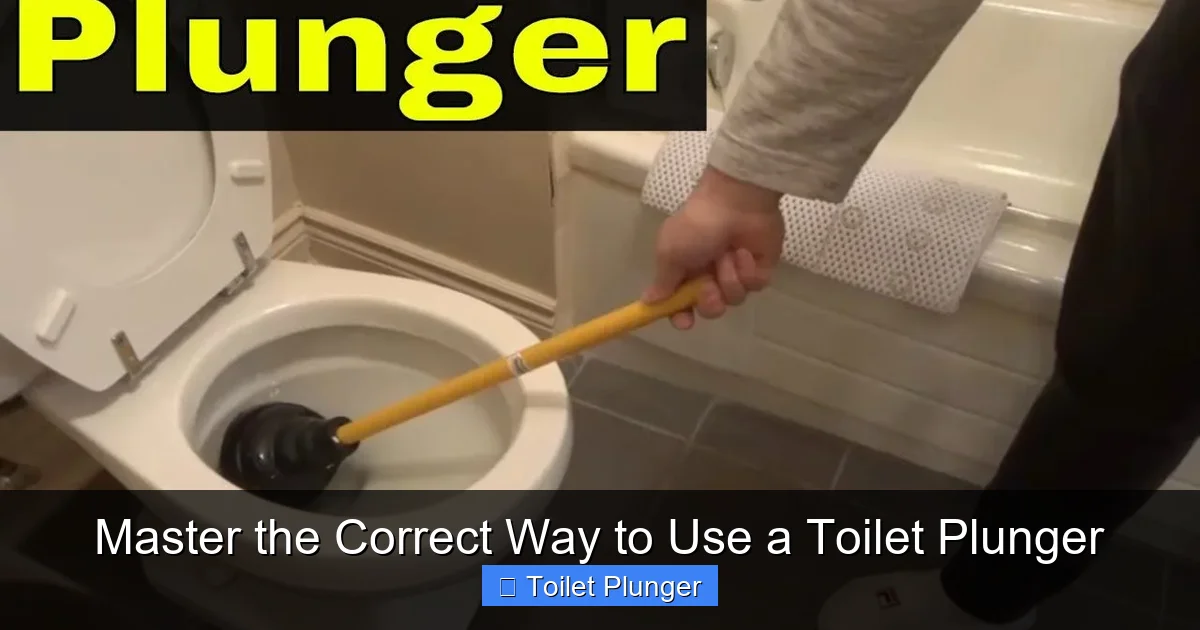
Step 3: Position the Plunger Correctly
This step is critical for creating the seal that makes plunging effective. A poor seal means wasted effort.
Visual guide about Master the Correct Way to Use a Toilet Plunger
Image source: i.ytimg.com
Ensure a Tight Seal
Take your toilet plunger and insert it into the bowl at an angle. Aim the flange directly into the drain hole at the bottom of the toilet. Press down gently until the cup is fully submerged and the flange is inside the drain. The rubber should flex to form an airtight seal around the hole. If air escapes or you hear gurgling, adjust the position until it’s snug.
Submerge the Plunger in Water
Make sure the entire cup of the toilet plunger is under water. This water helps create hydraulic pressure that pushes and pulls on the clog. If needed, add more warm water as mentioned earlier. A dry plunge won’t generate enough force.
Step 4: Execute the Plunging Motion
Now for the action! The way you plunge determines success. It’s not just about brute force—it’s about technique.
The Push-Pull Technique
With the toilet plunger sealed, grip the handle firmly with both hands. Push down slowly and steadily to compress the air and water. Then, pull up vigorously to create suction. This push-pull action should be rhythmic and controlled. Think of it as a pump: you’re trying to dislodge the clog by alternating pressure and suction.
Maintain the Seal
Throughout the motion, keep the plunger cup sealed over the drain. Don’t break contact with the toilet surface. If the seal breaks, reposition and start again. A consistent seal ensures maximum force is directed at the clog.
Number of Plunges
Repeat the push-pull motion 15 to 20 times in a row. For stubborn clogs, you might need more. Be patient—sometimes it takes a minute or two of continuous plunging. Listen for a gurgle or feel a sudden release, which indicates the clog is moving.
Step 5: Check for Success
After plunging, it’s time to see if the clog is clear. Do this carefully to avoid overflow.
Test the Flush
Gently lift the toilet plunger out of the water. If water starts draining quickly, that’s a good sign. Flush the toilet normally. If it flushes smoothly and the bowl refills without rising, congratulations! You’ve mastered the correct way to use a toilet plunger. If the water drains slowly or the clog persists, don’t worry—move to the next step.
Repeat if Necessary
If the first attempt doesn’t work, repeat the plunging process. Sometimes, clogs need multiple rounds. Reposition the toilet plunger, ensure a seal, and plunge again for another 15-20 motions. You can also try letting the toilet sit for a few minutes between attempts to allow pressure to build.
Step 6: Clean Up Afterward
Once the clog is clear, proper cleanup is essential for hygiene and maintenance.
Disinfect the Plunger
Rinse the toilet plunger in the toilet bowl by swirling it in clean water. Then, take it to a utility sink or bathtub and wash it with hot soapy water. For thorough disinfection, soak it in a bleach solution (one part bleach to ten parts water) for a few minutes. Rinse well and let it air-dry completely before storing.
Clean the Area
Remove the towels around the toilet and wash them if reusable, or dispose of them if they’re too soiled. Wipe down the toilet base and floor with disinfectant. Wash your gloves with soap and water, and wash your hands thoroughly afterward. This prevents the spread of germs.
Troubleshooting: When the Toilet Plunger Doesn’t Work
Sometimes, even with perfect technique, a clog might resist. Here’s what to do.
Common Issues and Solutions
Issue: No seal is formed. Solution: Check that you’re using a flange toilet plunger. Ensure the rubber is soft and flexible; if it’s cracked or worn, replace it. Add more water to the bowl if needed.
Issue: Water won’t drain after multiple attempts. Solution: The clog might be deeper. Try plunging with more force or for a longer duration. You can also pour a bucket of warm water (not boiling) from waist height into the bowl to add pressure.
Issue: Toilet overflows during plunging. Solution: Stop immediately and use a cup to remove excess water. Plunge more gently, focusing on slow, steady motions.
Alternative Methods
If the toilet plunger fails, consider these options:
- Toilet auger: Also called a closet auger, this tool reaches deeper into the drain to break up or retrieve clogs. It’s a good next step before calling a plumber.
- Enzyme-based cleaners: For minor clogs, these can help break down organic matter over time, but avoid chemical drain cleaners as they can damage pipes.
- Professional help: If all else fails, contact a licensed plumber. They have the expertise to handle severe blockages without causing damage.
Conclusion: Become a Toilet Plunger Pro
Mastering the correct way to use a toilet plunger is a valuable life skill. It saves you from panic during clogs and keeps your plumbing in good shape. Remember, success lies in using the right toilet plunger, preparing well, creating a seal, and plunging with technique. Practice these steps, and you’ll handle most toilet clogs with ease. Share this guide with friends and family—everyone benefits from knowing how to use a toilet plunger properly. Happy plunging!