Emptying your Shark Robot Vacuum 2-in-1 is a simple, three-part process: the main dustbin, the self-cleaning brushroll canister, and the filter. This guide provides detailed, step-by-step instructions for each component to ensure your vacuum runs at peak efficiency. Regular and proper emptying is the key to maintaining powerful suction and a long-lasting machine.
Contents
- 1 Key Takeaways
- 2 How to Empty Your Shark Robot Vacuum 2-in-1 Easily: The Complete Guide
- 3 Preparation and Safety
- 4 Part 1: Emptying the Main Robot Dustbin
- 5 Part 2: Emptying the Self-Cleaning Brushroll Canister
- 6 Part 3: Maintaining the Filter
- 7 Bonus Tips for Optimal Performance
- 8 Troubleshooting Common Issues
- 9 Conclusion
- 10 Author
Key Takeaways
- Empty After Every Cycle: For consistent suction and to prevent debris from re-entering your home, get in the habit of emptying the dustbin after each cleaning session.
- It’s a Two-Part System: Remember to empty both the main robot dustbin and the self-cleaning brushroll canister located on the docking station for a complete clean.
- Handle the Filter with Care: The filter should be tapped clean weekly and only washed occasionally; always ensure it is completely dry before reinserting to avoid damage.
- Mind the Sensors: Gently wipe the charging contacts on the robot and dock, and the cliff sensors on the robot’s underside, to maintain reliable navigation and docking.
- Prevent Clogs and Odors: Regular emptying, especially of fine dust, prevents clogs in the system and stops unpleasant smells from developing in the dustbin.
- Safety First: Always power off the robot vacuum by pressing its CLEAN button before removing any parts for maintenance.
How to Empty Your Shark Robot Vacuum 2-in-1 Easily: The Complete Guide
Congratulations on your Shark Robot Vacuum 2-in-1! This smart machine takes the hassle out of daily floor cleaning. But for it to work its best, it needs a little help from you. The most important routine task is emptying it. This isn’t just about tossing out dirt. It’s about maintaining powerful suction, preventing clogs, and ensuring your robot lives a long, healthy life.
This easy guide will walk you through the entire process. We will cover all the parts: the main dustbin, the unique self-cleaning brushroll system, and the filter. You will learn not just the “how,” but also the “why” and the “how often.” Let’s get your Shark robot vacuum emptied and ready for its next mission!
Preparation and Safety
Before you start, let’s set up for success. This takes less than a minute.
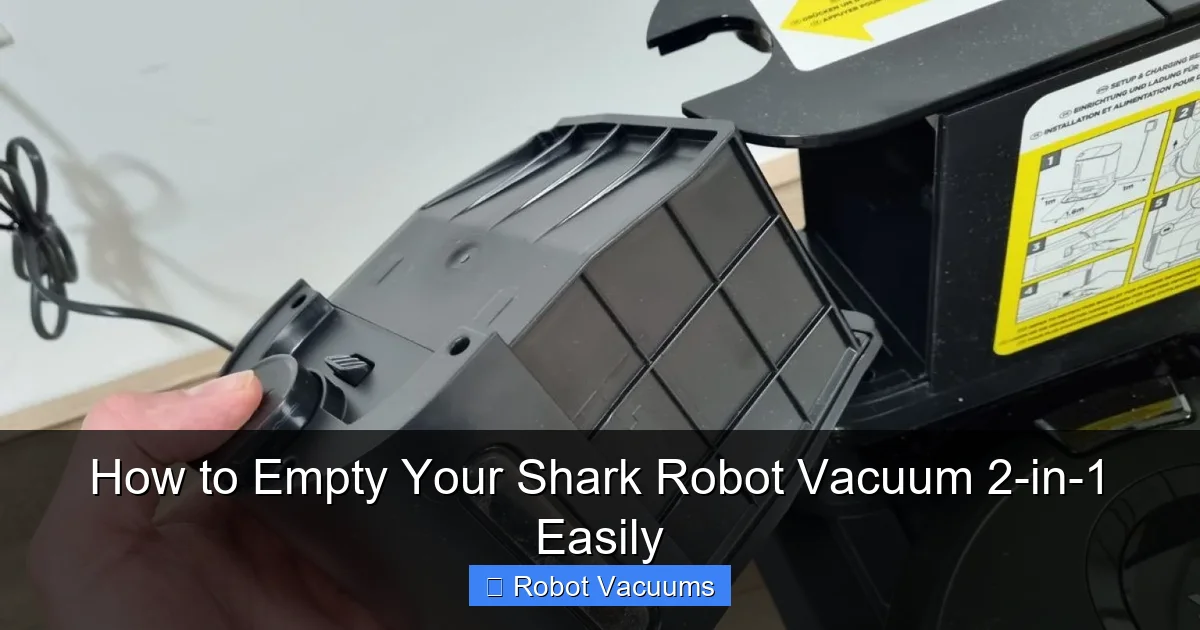
Visual guide about How to Empty Your Shark Robot Vacuum 2-in-1 Easily
Image source: vacuumtester.com
Step 1: Power Down the Robot
If your robot is cleaning, press the CLEAN button on top to stop it. If it’s docked, you can still press the button to ensure it’s in a standby mode. This is a simple safety step to prevent the motors from accidentally turning on.
Step 2: Gather Your Supplies
You don’t need much! Have a trash bag or bin nearby. A small, dry brush (like a clean paintbrush) is helpful for cleaning the filter. A microfiber cloth is great for wiping surfaces. That’s it!
Step 3: Work in a Well-Lit Area
Take your robot vacuum to a trash can or a space with good light. A kitchen or garage trash bin is perfect. This helps you see all the dust and debris clearly.
Part 1: Emptying the Main Robot Dustbin
This is the primary container for all the dirt, dust, and debris picked up from your floors.
Step 1: Open the Dustbin Lid
Locate the lid on top of your Shark robot vacuum. You will see a latch or button, usually near the back. Press this latch and lift the lid fully open. The dustbin is now accessible.
Step 2: Remove the Dustbin
Grab the handle of the dustbin (it’s often green or a contrasting color) and pull it straight up and out of the robot’s body. It should come out smoothly.
Step 3: Empty the Contents
Hold the dustbin over your trash can. Find the bottom door or flap. There is typically a button or lever to release it. Press it and the door will swing open, letting all the debris fall out into the trash. Give it a gentle shake or tap to dislodge any stuck particles, especially fine dust.
Step 4: Check and Close
Peek inside to make sure it’s completely empty. Close the bottom door securely until you hear a click. A door that isn’t fully closed can leak dust back into your home.
Step 5: Reinsert the Dustbin
Align the dustbin with the slot inside the robot. Slide it straight down until it seats fully. You should feel it click into place. Close the robot’s top lid. You have completed the first major step!
Part 2: Emptying the Self-Cleaning Brushroll Canister
This is the special feature of your 2-in-1 system! The docking station doesn’t just charge the robot; it also cleans its brushroll. The hair and string it removes gets stored in a separate canister on the dock.
Step 1: Locate the Canister on the Dock
Look at your CleanBase or docking station. On the front or side, you will see a panel or a container. This is the self-cleaning brushroll canister.
Step 2: Remove the Canister
There is a button or handle to release it. Press it and pull the canister straight out. It is smaller than the robot’s dustbin.
Step 3: Empty the Debris
This canister is often full of wound-up hair and fibers. Open the lid (the mechanism varies by model) and pull the debris out. You may need to use your fingers or scissors to cut through long hair strands wrapped around the inner core. Empty everything into the trash.
Step 4: Reinstall the Canister
Make sure the canister lid is closed. Slide it back into the docking station until it clicks and sits flush. This step is crucial. If the canister isn’t in correctly, the self-cleaning function may not work on the next docking cycle.
Part 3: Maintaining the Filter
The filter is the lungs of your Shark robot vacuum. It traps fine dust and allergens. A clean filter means strong suction.
Step 1: Remove the Filter
Take the main dustbin out again. The filter is located inside it, usually under a small cover or flap. Open that compartment and gently lift the filter out.
Step 2: Clean the Filter
Do not use water for regular cleaning. Tap the filter gently against the inside of your trash can to dislodge dust. Use your dry brush to carefully clean between the pleats. Get as much fine dust out as possible.
Step 3: Occasional Washing (Important!)
Every few months, or if it looks very dirty, you can wash it. Use cold water only. Rinse it from the clean side to push dirt out the dirty side. Do not use soap or detergents. Do not twist or wring it. Just let water run through it.
Step 4: Dry Completely
This is the most important part. Let the filter air dry for a full 24 hours, away from direct heat or sunlight. It must be 100% bone dry before you put it back. A damp filter will ruin suction and can cause mold and odors.
Step 5: Reinsert the Filter
Once completely dry, place the filter back into its compartment in the dustbin. Close the cover securely. Then, put the dustbin back into the robot.
Bonus Tips for Optimal Performance
Do these quick tasks every few weeks to keep your robot in top shape.
- Wipe the Sensors: Use a dry microfiber cloth to gently clean the cliff sensors (the black windows on the underside) and the charging contacts on the robot and dock.
- Check the Brushroll: Even with self-cleaning, occasionally remove the side brush and main brushroll from the robot to cut away any stubborn hair wraps.
- Clean the Dustbin Itself: Every month, wipe the inside of the empty dustbin with a dry or slightly damp cloth to prevent dust buildup and odors.
Troubleshooting Common Issues
Having a problem? Here are simple fixes.
Robot Says “Empty Dustbin” But It’s Empty
The sensor might be blocked by fine dust. Empty the dustbin again over a trash can, tapping it firmly. Use your brush to clean the small sensor window inside the dustbin compartment of the robot.
Weak Suction After Emptying
This is almost always a filter issue. Did you put a damp filter back in? Take it out and let it dry for 24 hours. Is the filter old and damaged? It may be time for a replacement (check your model number for the right part).
Self-Cleaning Dock Isn’t Working
First, ensure the canister is correctly inserted and empty. Second, check that the robot is seated properly on the dock. Clean the robot’s brushroll and the dock’s intake area with a cloth or brush to remove any blockages.
Conclusion
You’ve done it! Emptying your Shark Robot Vacuum 2-in-1 is a straightforward three-part routine: dustbin, canister, filter. By making this a habit after major cleaning cycles, you protect your investment and ensure your floors get the deepest clean possible. Remember, a well-maintained robot vacuum is a happy and efficient robot vacuum. Now, sit back, press CLEAN, and enjoy your spotless floors with the confidence that you know exactly how to care for your handy cleaning companion.
🎥 Related Video: Robot Vacuum | Getting Started with the Shark Matrix™ Plus 2-in-1 Self-Empty Robot Vacuum and Mop
📺 Shark Home
Don’t forget to subscribe!
