This guide provides a complete breakdown of how to use a toilet plunger effectively to solve common toilet clogs. With the right technique and tools, you can avoid messy overflows and costly plumber visits. Follow our simple steps to master this essential household skill in no time.
Contents
- 1 Key Takeaways
- 2 Introduction to Using a Toilet Plunger
- 3 Step 1: Gather Your Tools and Prepare the Area
- 4 Step 2: Choose the Right Toilet Plunger
- 5 Step 3: Position the Plunger Correctly in the Bowl
- 6 Step 4: Create a Secure, Airtight Seal
- 7 Step 5: Master the Plunging Technique
- 8 Step 6: Check Progress and Repeat if Needed
- 9 Step 7: The All-Important Cleanup
- 10 Practical Tips for Effective Plunging
- 11 Troubleshooting Common Plunging Issues
- 12 Conclusion: Become a Plunging Pro
- 13 Author
Key Takeaways
- Use a Flange Plunger: Always choose a plunger with an extended rubber flap (flange) for toilets, as it creates a superior seal compared to standard cup plungers.
- Seal is Everything: Ensuring an airtight seal over the drain hole is critical for building the pressure needed to dislodge clogs effectively.
- Employ Vigorous, Controlled Motions: Push down firmly and pull up sharply in a rhythmic pumping action without breaking the seal to clear blockages.
- Be Patient and Persistent: Stubborn clogs often require multiple rounds of plunging; don’t give up after the first attempt.
- Prioritize Hygiene and Cleanup: Wear gloves and thoroughly disinfect the plunger and area after use to prevent the spread of germs.
- Plunge Before Turning to Chemicals: Mechanical plunging is safer for your pipes and often more effective than chemical drain cleaners as a first resort.
- Know Your Limits: If repeated plunging fails, the clog may be deeper, signaling it’s time to use a toilet auger or call a professional plumber.
Introduction to Using a Toilet Plunger
A clogged toilet is a common household headache. It can cause anxiety, mess, and inconvenience. But here’s the good news. You can often fix it yourself in minutes. Learning how to use a toilet plunger effectively is a vital life skill. This guide is your masterclass. We will walk you through every detail. You will learn the art of unclogging toilets with confidence. No more panic. No more waiting for a plumber. Just simple, effective solutions.
In this comprehensive guide, you will discover the step-by-step process of how to use a toilet plunger. We cover everything from selecting the right tool to post-plunge cleanup. We include practical tips, common mistakes to avoid, and troubleshooting advice. By the end, you will transform from a novice to a plunging pro. Let’s get started on mastering how to use a toilet plunger effectively.
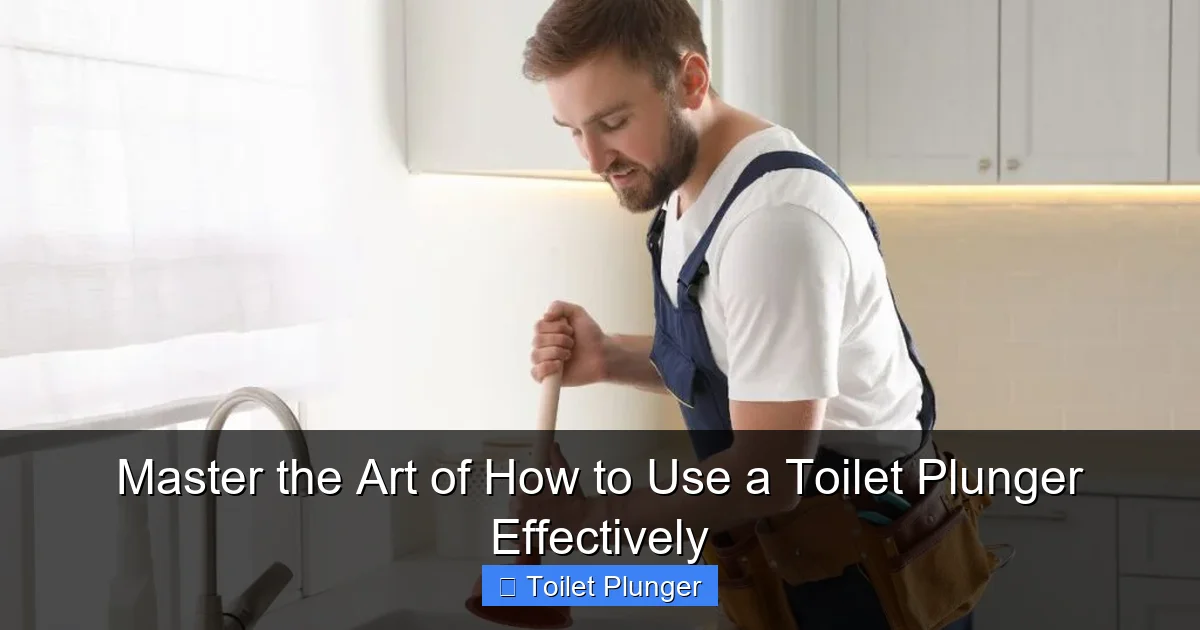
Step 1: Gather Your Tools and Prepare the Area
Preparation is key to a successful and clean plunging experience. Rushing in can lead to spills and frustration.
Visual guide about Master the Art of How to Use a Toilet Plunger Effectively
Image source: tumgazeteler.com
Assemble Your Supplies
Before you begin, collect these items:
- A toilet plunger: We’ll discuss the best type in the next step.
- Rubber gloves: Essential for hygiene and keeping your hands clean.
- Old towels or rags: Place these around the toilet base to catch any splashes or overflow.
- A bucket: Useful for adding water to the bowl if the level is low.
- Mild disinfectant or bleach: For cleaning the plunger and area afterwards.
Set the Stage
Clear any items like bathroom mats or magazines from the floor. Lay down your towels in a circle around the toilet. Put on your rubber gloves. This simple prep work makes the entire process of learning how to use a toilet plunger effectively much smoother and less messy.
Step 2: Choose the Right Toilet Plunger
Using the wrong plunger is a common mistake. It can make unclogging much harder. Understanding the tools is the first step in mastering how to use a toilet plunger.

Visual guide about Master the Art of How to Use a Toilet Plunger Effectively
Image source: static.vecteezy.com
Plunger Types Explained
There are two primary designs:
- Cup Plunger (Sink Plunger): This has a simple, dome-shaped rubber cup. It’s designed for flat surfaces like sink and bathtub drains. It often fails to seal properly in a toilet bowl.
- Flange Plunger (Toilet Plunger): This features the same cup but with a soft, accordion-like rubber flap (the flange) extending from the bottom. This flange is designed to fit snugly into the toilet’s drain hole, creating the airtight seal necessary for effective plunging.
Why the Flange Plunger Wins for Toilets
The unique design of a flange plunger is why it’s the only real choice for toilets. The flange folds out when you push down, filling the drain pipe’s opening. This prevents the plunger from popping out and allows you to build strong hydraulic pressure. If you want to learn how to use a toilet plunger effectively, start with the right tool.
Step 3: Position the Plunger Correctly in the Bowl
Correct positioning sets the stage for powerful plunging. Incorrect placement leads to weak pressure and messy splashing.
Visual guide about Master the Art of How to Use a Toilet Plunger Effectively
Image source: m.media-amazon.com
Submerge the Plunger
Gently lower the plunger into the toilet bowl. The entire rubber cup, especially the flange, must be underwater. Water is not the enemy here; it’s the medium that transmits force. If the water level in the bowl is too low to cover the plunger, use your bucket to carefully add water until it’s submerged by an inch or two. This is a crucial tip for how to use a toilet plunger effectively.
Center Over the Drain
Manually guide the plunger so it sits directly over the drain hole at the bottom of the bowl. The flange should be pointing downward, ready to insert into the drain. Take a moment to ensure it’s centered. A misaligned plunger will not seal properly.
Step 4: Create a Secure, Airtight Seal
The seal is the engine of your plunging operation. Without it, you’re just sloshing water around.
The Gentle Settling Press
With both hands on the handle, press the plunger down slowly and evenly. Let the air bubble out from under the cup. You should feel the rubber flatten against the contours of the bowl and drain. Stop when you meet firm resistance. The goal is to have the flange inserted into the drain and the cup rim pressed tightly against the porcelain.
Check for Leaks
Visually check the rim of the plunger cup. If you see air bubbles escaping, the seal is broken. Gently rock the plunger or adjust its angle until the bubbling stops. A perfect seal means no air escapes when you push down. Mastering this seal is at the heart of how to use a toilet plunger effectively.
Step 5: Master the Plunging Technique
This is the action phase. The right technique uses physics to your advantage, forcing water back and forth to break up the clog.
The Optimal Motion: Push and Pull
With a firm seal established, grip the handle with both hands. Now, use a strong, steady, pumping motion:
- Push Down: Drive the handle down firmly. This forces water and air pressure into the drain pipe against the clog.
- Pull Up: Immediately pull back up sharply. This creates a suction effect that can help pull the clog loose.
The motion should be rhythmic—like a pump—not a frantic jab. Keep the seal intact throughout. Break the rhythm only after 15-20 full pumps.
Pacing and Power
Start with moderate force. If the clog is minor, this might work quickly. For tougher clogs, increase your vigor gradually. The key is controlled power. Jerking too hard can break the seal or cause water to splash over the rim. Remember, learning how to use a toilet plunger effectively is about finesse as much as force.
Step 6: Check Progress and Repeat if Needed
Plunging isn’t always a one-and-done deal. Patience and observation are your allies.
Test the Drainage
After a solid set of plunges, quickly break the seal by tilting the plunger to the side and lifting it out of the water. Observe what happens. If you hear a glorious “gurgle” and see the water level rapidly draining away, congratulations! The clog is clear. Go ahead and give the toilet a test flush.
When to Go Again
If the water level remains high or drains very slowly, the clog is likely still there. Don’t be discouraged. Simply re-establish the seal and perform another series of 15-20 pumps. Sometimes, clogs need several rounds of this hydraulic pressure to fully break apart. This persistence is part of mastering how to use a toilet plunger effectively.
Step 7: The All-Important Cleanup
A job isn’t finished until everything is clean. Proper cleanup is hygienic and prepares you for next time.
Clean Your Plunger
Hold the plunger over the toilet bowl to let excess water drip off. Then, rinse it thoroughly in the bathtub or with a hose. Spray or wipe it down with a disinfectant or a bleach solution. Place it in a dedicated plunger holder or a clean bucket to dry. Never store a dirty plunger.
Clean the Toilet and Area
Use disinfectant wipes or a spray to clean the toilet handle, seat, and bowl rim—anywhere you might have touched. Wipe down the floor with the towels you laid out, then wash them or dispose of them if they’re very soiled. Finally, wash your gloved hands, then remove the gloves and wash your bare hands with soap and water.
Practical Tips for Effective Plunging
Beyond the basic steps, these pro tips will elevate your plunging game and help you master how to use a toilet plunger effectively.
- Lubricate with Dish Soap: Squirt a generous amount of liquid dish soap into the bowl before plunging. It can help lubricate the pipe and break down greasy clogs.
- Try Warm Water: For very stubborn clogs, pour a bucket of warm (not boiling) water into the bowl from waist height after a few plunging attempts. The heat and force can help dislodge the blockage.
- Plunge, Then Flush: Only flush the toilet to test after plunging, not before. Flushing a clogged toilet can cause an overflow.
- Maintain Your Tool: Inspect your flange plunger regularly. If the rubber becomes cracked, hard, or misshapen, it won’t seal properly. Replace it.
- Use a Dedicated Toilet Plunger: Have one plunger for toilets only and another for sinks/tubs. This prevents cross-contamination of bacteria.
Troubleshooting Common Plunging Issues
Even with the best technique, you might hit a snag. Here’s how to troubleshoot common problems.
The Plunger Won’t Create a Seal
If you can’t get a seal, check the water level. Add more if needed. Also, inspect the plunger’s rubber. If it’s old and inflexible, it may be time for a new one. Ensure the flange is fully extended and not folded in on itself.
Water is Threatening to Overflow
If the water level rises dangerously during plunging, stop immediately. Use your bucket to carefully scoop out some water from the bowl into the tub or sink. Lower the water level, then resume plunging more gently.
The Clog Absolutely Will Not Move
If you’ve given it multiple strong attempts with no change, the clog may be too deep or solid (like a toy or a dense mass of paper). This is when you graduate to a toilet auger (closet snake), a tool designed to reach deeper into the drain. If that fails, it’s professional plumber time.
Unpleasant Odors After Plunging
Sometimes plunging can release trapped sewer gases. Run the bathroom fan, open a window, and use a bathroom disinfectant spray. A thorough cleanup, as described, will also minimize odors.
Conclusion: Become a Plunging Pro
You’ve now completed the masterclass. You possess the knowledge to handle one of the most common household emergencies with calm and competence. Learning how to use a toilet plunger effectively is about more than just fixing a clog; it’s about self-reliance. You save money, avoid stress, and gain a practical skill for life.
Remember the core principles: the right flange plunger, a perfect seal, vigorous yet controlled pumping, and thorough cleanup. Keep your plunger accessible and in good condition. With this guide, you have truly mastered the art of how to use a toilet plunger. Go forth with confidence—your throne awaits, fully functional.