This guide provides a complete, step-by-step method for using a toilet brush effectively and hygienically. You’ll learn the proper scrubbing technique, essential pre-and post-cleaning steps, and how to maintain your brush to prevent germ spread. Following these practices ensures a thoroughly clean toilet while maximizing your tool’s lifespan and upholding bathroom hygiene.
Contents
- 1 Key Takeaways
- 2 Master the Art of Using a Toilet Brush Correctly
- 3 Step 1: Gather Your Supplies and Prepare
- 4 Step 2: The Correct Scrubbing Technique
- 5 Step 3: Rinsing the Brush and Flushing
- 6 Step 4: Proper Storage and Drying
- 7 Step 5: Brush Maintenance and Replacement
- 8 Troubleshooting Common Toilet Brush Problems
- 9 Conclusion: Hygiene and Confidence
- 10 Author
Key Takeaways
- Preparation is Key: Always gather your supplies (brush, cleaner, gloves) and apply toilet cleaner to the bowl first, letting it sit to break down grime.
- Master the Scrubbing Motion: Use firm, swirling motions under the rim and a gentle, thorough polish on the visible bowl, reaching all curves and the trapway.
- Rinse the Brush Thoroughly: After scrubbing, rinse the brush bristles completely under hot running water in the toilet bowl to remove all debris and cleaner residue.
- Store It Dry and Ventilated: Always use a holder with ventilation holes and ensure the brush drips dry completely into the holder cup to prevent bacterial growth.
- Replace Regularly: Toilet brushes wear out and harbor germs; replace yours every 3-6 months or as soon as bristles look worn or discolored.
- Prioritize Personal Hygiene: Wear rubber gloves during the entire process and wash your hands thoroughly with soap and water after cleaning, even with gloves on.
Master the Art of Using a Toilet Brush Correctly
Let’s be honest. Cleaning the toilet is nobody’s favorite chore. But it’s a non-negotiable part of home hygiene. A clean toilet is vital for health and comfort. The humble toilet brush is your main weapon in this battle. Yet, many people use it wrong. This leads to poor results, bad smells, and even germ spread.
This guide will change that. We will transform this dreaded task into a quick, effective, and hygienic routine. You will learn the right way to use a toilet brush from start to finish. We’ll cover preparation, the perfect scrubbing technique, rinsing, and storage. You’ll also get tips on brush care and troubleshooting common problems. By the end, you’ll master the art of using a toilet brush correctly. Your bathroom will thank you.
Step 1: Gather Your Supplies and Prepare
Don’t just grab the brush and go. Good preparation makes the job faster and more effective.
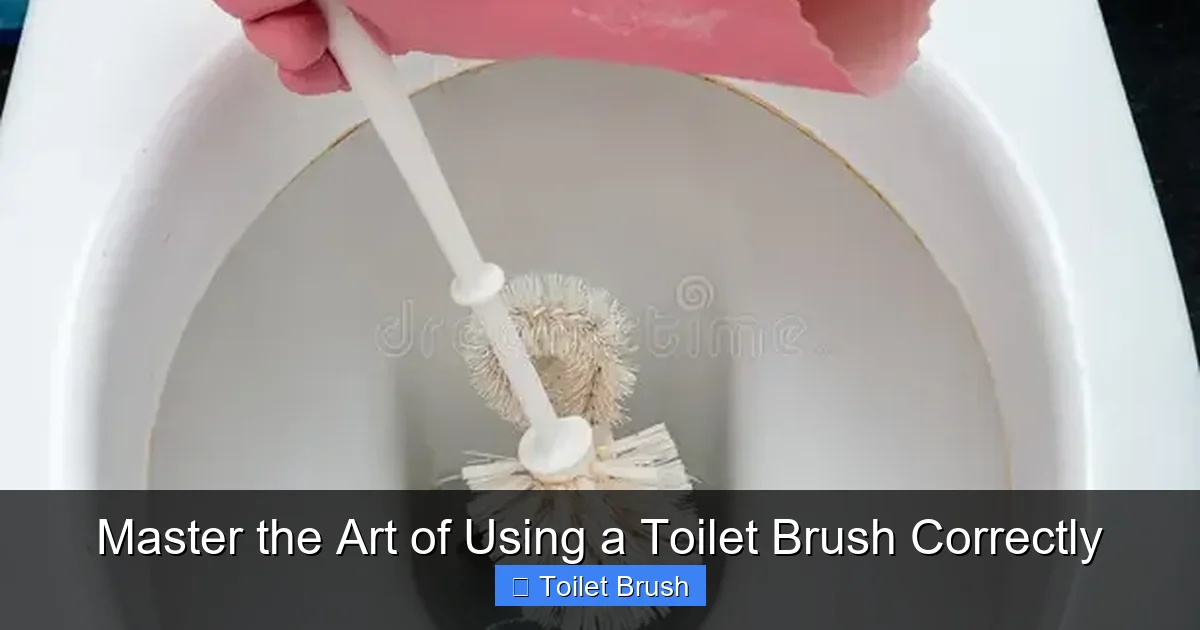
Visual guide about Master the Art of Using a Toilet Brush Correctly
Image source: thumbs.dreamstime.com
Assemble Your Cleaning Kit
First, get everything you need. This stops you from running around with dirty gloves later. You will need:
- Your toilet brush. Make sure it’s in good condition.
- A toilet bowl cleaner. Choose a gel or liquid that clings to the bowl.
- Disposable rubber gloves. This is non-negotiable for hygiene.
- All-purpose bathroom spray for the seat, lid, and tank handle.
- Paper towels or a dedicated cleaning cloth.
Apply the Cleaner
Put on your gloves. Lift the toilet seat and lid. Squirt your toilet cleaner under the rim of the bowl. Let the cleaner drizzle down the sides. Make sure you cover the entire interior surface. Pay special attention to the water line and under the rim. This is where mineral stains and germs love to hide. Now, here’s a pro tip: let the cleaner sit. Don’t scrub right away. Give it 5-10 minutes. This allows the chemicals to break down stains and disinfect. Use this time to wipe down the seat, lid, tank handle, and the outside of the bowl with your all-purpose spray.
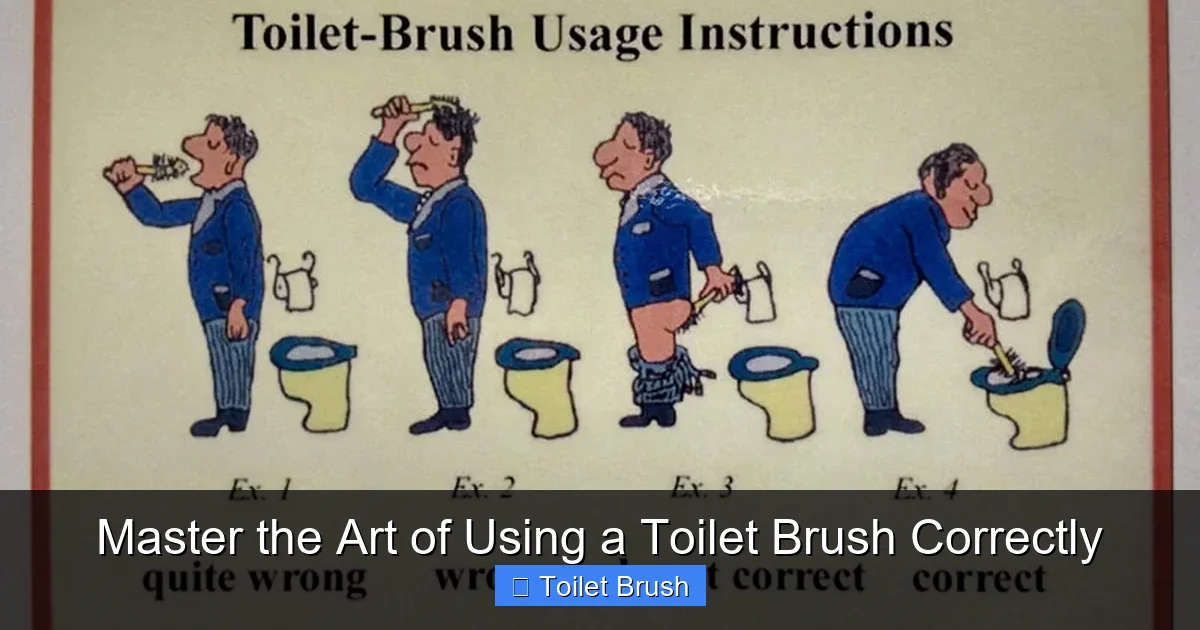
Step 2: The Correct Scrubbing Technique
This is the core of using a toilet brush correctly. Good technique gets the bowl clean without splashing.

Visual guide about Master the Art of Using a Toilet Brush Correctly
Image source: i2.wp.com
Start Under the Rim
Take your toilet brush. Start scrubbing under the rim where you applied the cleaner. Use firm, swirling motions. Press the bristles against the porcelain. Make sure you go all the way around. This area is a major hotspot for mold and lime scale.
Scrub the Bowl and Water Line
Next, move down the bowl. Use the same swirling motion. Scrub every inch of the interior. Focus on the water line. This is the ring that often forms where the water sits. You may need to apply a bit more pressure here. Don’t forget the curves near the base of the bowl and the trapway (the S-shaped pipe at the bottom). Gently guide the brush into the drain opening. Twist it around to dislodge any debris. Be thorough but not overly aggressive. You want to clean the bowl, not scratch it.
Polish for a Final Shine
For a truly sparkling finish, do a final “polish” scrub. Use lighter pressure and cover the whole bowl again. This ensures no spot is missed and the cleaner is fully worked in.
Step 3: Rinsing the Brush and Flushing
What you do after scrubbing is just as important. This step prevents a dirty, smelly brush.
Visual guide about Master the Art of Using a Toilet Brush Correctly
Image source: oddstuffmagazine.com
Rinse the Brush in the Toilet Water
Hold the brush over the bowl. Submerge the bristle head into the cleanest water at the bottom of the bowl. Swish it vigorously back and forth. Do this for 10-15 seconds. The goal is to rinse all the debris and cleaning solution off the bristles. You will see the water become slightly discolored. That’s the grime leaving the brush.
Flush and Final Rinse
Now, flush the toilet. As the water swirls and refills, hold the brush in the stream. Let the fresh, clean water rinse over the bristles one more time. This is a great final rinse. It ensures no residue is left on the brush.
Step 4: Proper Storage and Drying
How you store your toilet brush determines if it stays fresh or becomes a germ factory.
Shake and Drip Dry
After the final rinse, gently shake the brush over the toilet bowl to remove excess water. Do not flick it, as this can spread droplets. Then, place it directly into its holder. A good holder has a stand or cup to catch drips. Crucially, it must have ventilation holes. Airflow is your best friend. It helps the brush dry completely between uses.
Choose the Right Holder
Never store a wet toilet brush in a closed container. This creates a dark, damp, warm environment. Bacteria and mold will grow there very quickly. Always use an open or ventilated holder. Place the holder in a spot where it won’t be knocked over easily.
Step 5: Brush Maintenance and Replacement
Your toilet brush is a tool. Like all tools, it needs care and will eventually wear out.
Deep Clean Your Brush Monthly
Once a month, give your brush a deep clean. Fill the toilet bowl or a bucket with a mixture of hot water and bleach (or a disinfecting cleaner). Submerge the bristle head. Let it soak for about an hour. This kills any lingering germs and bleaches away stains. Rinse it thoroughly afterward.
Know When to Replace It
Toilet brushes don’t last forever. Look for these signs it’s time for a new one:
- Bristles are frayed, bent, or falling out. They won’t scrub effectively.
- Persistent stains or discoloration you can’t clean off.
- A lingering foul odor even after deep cleaning.
- General wear and tear after 3 to 6 months of regular use.
Using a worn-out brush is unhygienic and ineffective. Replace it promptly.
Troubleshooting Common Toilet Brush Problems
Sometimes, things don’t go as planned. Here are solutions to common issues.
Problem: The Brush is Smelly
Solution: This is usually from improper drying. Deep clean the brush as described above. Scrub the holder with hot, soapy water. Ensure both are completely dry before storing. Consider a holder with more ventilation.
Problem: It Doesn’t Reach All Stains
Solution: You might need a different brush shape. For deep trapways, a brush with a longer, narrower head may help. For tough mineral stains under the rim, let a strong acidic cleaner sit longer before scrubbing.
Problem: Bristles are Too Stiff or Too Soft
Solution: This is a matter of brush quality. For general cleaning, a medium-stiffness bristle is best. If you have delicate porcelain, look for softer bristles labeled “scratch-free.” For heavy stains, a firmer brush may be necessary.
Conclusion: Hygiene and Confidence
Mastering the art of using a toilet brush correctly is a simple yet powerful skill. It’s not just about a clean bowl. It’s about maintaining a hygienic home environment for you and your family. By following these steps—preparing properly, scrubbing with the right technique, rinsing thoroughly, and storing correctly—you turn a chore into a quick win. You prevent the spread of germs. You extend the life of your tools. Most importantly, you gain the confidence of knowing your bathroom is truly clean. Grab your gloves and your brush. You are now ready to tackle this task like a pro.
🎥 Related Video: How to use a toilet brush #shorts #howto #learning
📺 StillLearningTheBasics