A toilet plunger not working usually stems from using the wrong type of plunger, incorrect technique, or a more serious clog or ventilation issue. This guide will walk you through step-by-step solutions, from perfecting your plunge to troubleshooting hidden problems like blocked vents. You’ll learn how to get your toilet flowing freely again.
There are few household moments more stressful than a clogged toilet that refuses to be unclogged. You’re plunging with all your might, water is sloshing ominously, but the level just won’t go down. Frustration builds. Before you call a plumber (and open your wallet), take a breath. Often, a toilet plunger not working is not a sign of a major disaster, but a simple problem with an easy fix.
This guide will be your savior. We’ll explore the common reasons your plunger efforts are failing and provide clear, step-by-step solutions. You’ll learn about the right tools, the perfect technique, and how to troubleshoot deeper issues. By the end, you’ll be equipped to handle most toilet clogs with confidence.
Contents
- 1 Key Takeaways
- 2 1. Diagnosing the Problem: Why Your Plunge is Failing
- 3 2. Step-by-Step: The Right Way to Plunge a Toilet
- 4 3. Troubleshooting Specific Plunger Failures
- 5 4. When the Problem Isn’t the Clog: The Vent Pipe
- 6 5. The Next Level Tool: Using a Toilet Auger
- 7 6. Prevention: How to Avoid Future Clogs
- 8 Conclusion: Regain Your Plumbing Confidence
- 9 Author
Key Takeaways
- Use the Right Tool: A flange plunger is designed for toilets, creating a much better seal than a standard cup plunger.
- Master the Technique: It’s about creating pressure waves, not just brute force. A proper seal and rhythmic pumping are key.
- Check for a Seal: Air or water escaping around the plunger rim is the #1 reason for failure. Ensure the flange is fully engaged in the drain.
- Maintain Your Plunger: A cracked, stiff, or misshapen plunger won’t work. Clean it and store it properly to extend its life.
- Know When to Escalate: Persistent clogs may be deeper in the drain line, caused by non-flushable items or a blocked vent pipe.
- Have a Backup Plan: A closet auger (toilet snake) is the logical next tool for tough clogs a plunger can’t handle.
- Prevent Future Clogs: Be mindful of what you flush and consider regular maintenance to avoid repeat performances.
1. Diagnosing the Problem: Why Your Plunge is Failing
Before you plunge again, let’s figure out why it’s not working. The issue typically falls into one of three categories.
You’re Using the Wrong Type of Plunger
This is the most common mistake. That red rubber cup plunger? That’s a sink or tub plunger. Toilets require a flange plunger (often called a toilet plunger). The key difference is the soft rubber flange that folds out from the cup. This flange is designed to fit snugly into the toilet’s drain hole, creating an essential air-tight seal that the standard cup simply cannot achieve.
Your Plunging Technique is Off
Plunging isn’t about wild, forceful stabbing. It’s a science of pressure and suction. If you’re breaking the seal with each thrust or not using enough water, you’re just moving water around, not moving the clog. We’ll fix that.
The Clog is Too Severe or in the Wrong Place
Sometimes, it’s not you or the tool. The clog might be too far down the drain line, made of stubborn materials (like toys or excessive hygiene products), or caused by a secondary issue like a blocked plumbing vent on your roof.
2. Step-by-Step: The Right Way to Plunge a Toilet
Let’s reset and do this properly from the start.
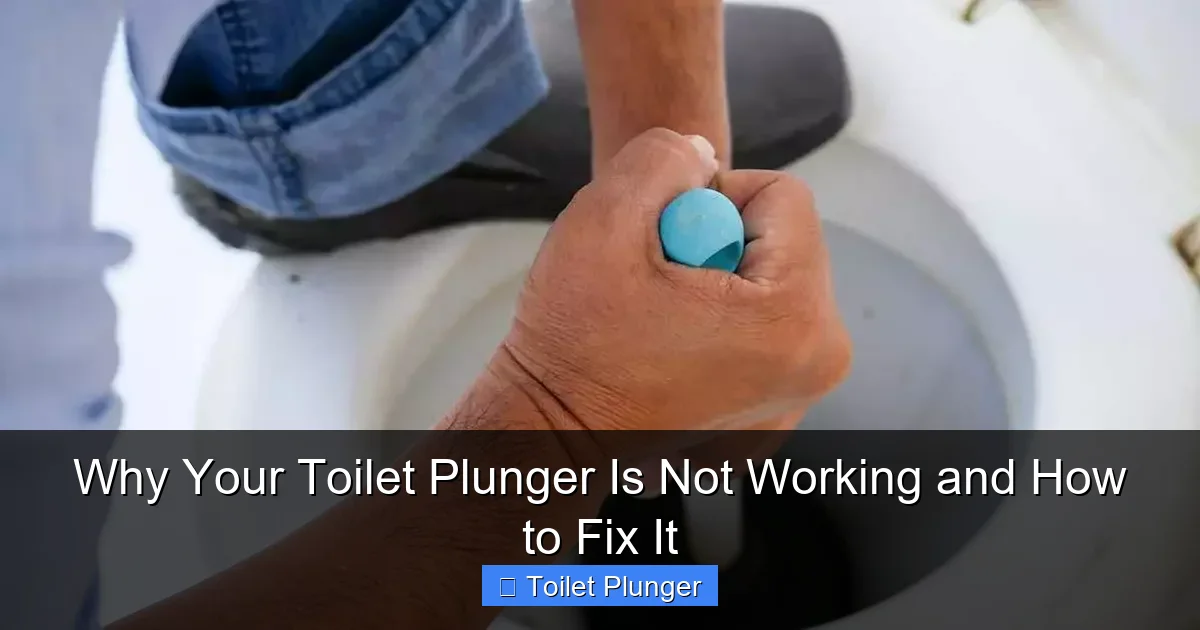
Visual guide about Why Your Toilet Plunger Is Not Working and How to Fix It
Image source: akwaterworks.net
Step 1: Gather Your Supplies
You’ll need:
- A flange plunger (toilet plunger)
- Rubber gloves
- Old towels or newspaper for the floor
- A bucket (optional, but helpful)
Step 2: Prepare the Area and the Toilet
Put on your gloves and lay towels around the base. If the toilet bowl is very full, carefully scoop some water into a bucket to prevent overflow. You need enough water to cover the plunger’s cup, but not so much that it spills. Pro Tip: Add a little hot (not boiling) water to the bowl to help soften some organic matter.
Step 3: Create the Perfect Seal
Extend the flange from the cup. Insert the plunger into the bowl at an angle, letting water fill the cup. Then, gently but firmly press straight down so the flange slides into the drain opening and the cup flattens against the bowl’s contour. This seal is everything. No air or water should bubble out around the rim.
Step 4: Execute the Correct Plunging Motion
With a firm grip on the handle, use slow, deliberate strokes. Push in firmly, then pull back gently to create a suction effect. The goal is to create strong pressure waves that dislodge the clog, not to force air down the drain. Do this 10-15 times. Then, with a quick motion, break the seal and pull the plunger away. Watch the water level.
Step 5: Evaluate and Repeat
If the water drains away quickly, success! Flush the toilet to clear the pipes. If it drains slowly or not at all, repeat the process 2-3 more times. Sometimes clogs need sustained effort.
3. Troubleshooting Specific Plunger Failures
What if you’re doing everything right and it’s still not working? Let’s troubleshoot.

Visual guide about Why Your Toilet Plunger Is Not Working and How to Fix It
Image source: somdmda.org
The Plunger Won’t Create a Seal
If air or water keeps escaping:
- Check the flange: Is it torn, stiff, or cracked? If so, the plunger needs replacing.
- Try petroleum jelly: Smear a little around the rim of the plunger cup to create a better seal against the porcelain.
- Double-check the angle: Ensure you’re pressing straight down, not at an angle that lifts one side.
Water is Splashing Out, But Not Draining
This means you’re creating pressure, but the clog isn’t moving. The clog is likely solid and lodged. It’s time to move to a closet auger (toilet snake). This tool can reach past the toilet trap and hook or break up the obstruction.
The Water Drains Slowly Then Stops
A partial clear suggests the clog is breaking up but not fully gone. Try plunging again, or use a measured amount of enzymatic drain cleaner (avoid harsh chemicals if possible, as they can damage pipes). A second round of plunging often finishes the job.
4. When the Problem Isn’t the Clog: The Vent Pipe
Here’s a pro secret. Your home’s plumbing has vent pipes that run to the roof to let air in. This air allows wastewater to flow smoothly. If this vent is blocked (by leaves, a bird’s nest, or ice), it creates a vacuum in the drain line.
Visual guide about Why Your Toilet Plunger Is Not Working and How to Fix It
Image source: cdn.shopify.com
Symptoms of a blocked vent: Multiple drains are slow (sinks, tubs), toilets gurgle when flushed or when a sink drains, and plunging seems ineffective because air can’t get behind the water to push the clog.
Solution: This often requires going onto the roof to clear the vent stack opening. If you’re uncomfortable with heights, this is a definite call to a plumber.
5. The Next Level Tool: Using a Toilet Auger
If plunging definitively fails, your best friend is a closet auger. It’s a specialized snake for toilets with a protective sleeve to prevent scratching the porcelain.
- Fully insert the auger’s tip into the drain.
- Crank the handle to extend the cable down through the toilet’s trap and into the drain line.
- When you feel resistance, crank gently to either hook onto the clog or break it apart.
- Slowly retract the cable, clean it, and then test flush the toilet.
6. Prevention: How to Avoid Future Clogs
The best fix is preventing the problem.
- Only flush the “Three P’s”: Pee, Poo, and (Toilet) Paper.
- Avoid “Flushable” Wipes: They do not break down like toilet paper and are a leading cause of clogs.
- Use Less Paper: Don’t overload the bowl with a huge mound of paper.
- Regular Maintenance: A monthly preventative flush with a bucket of hot water and a cup of white vinegar can help keep pipes clear.
Conclusion: Regain Your Plumbing Confidence
A toilet plunger not working is usually a solvable puzzle. Start by ensuring you have the right tool—a flange plunger—and master the seal-and-rhythm technique. If that doesn’t work, systematically troubleshoot: check the plunger’s condition, consider a toilet auger for tough blockages, and be aware of rare issues like a blocked vent. Most clogs are within a homeowner’s ability to fix. With this knowledge, you can save time, money, and your sanity the next time a toilet threatens to overflow.