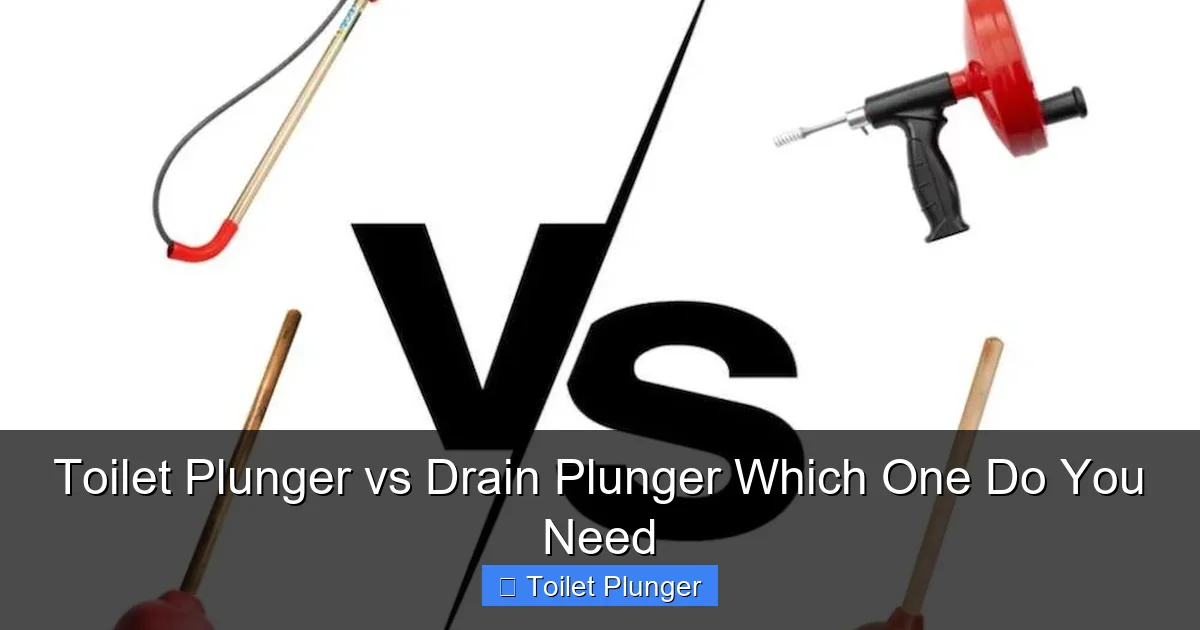
Using the wrong plunger can make a clog worse. This guide clearly explains the crucial differences between a toilet plunger (with a flange) and a flat-bottom drain plunger. You’ll learn how to identify, use, and choose the right plunger for your bathroom, sink, or tub, saving you time, mess, and frustration.
Contents
- 1 Key Takeaways
- 2 Toilet Plunger vs Drain Plunger: Which One Do You Need?
- 3 The Champions: Meet Your Two Plungers
- 4 Choosing Your Weapon: Which Plunger for Which Clog?
- 5 How to Plunge a Toilet Like a Pro
- 6 How to Plunge a Sink or Tub Drain
- 7 Troubleshooting: When Plunging Doesn’t Work
- 8 The Final Verdict: What Should You Buy?
- 9 Author
Key Takeaways
- Design is Key: A toilet plunger has an extra soft rubber flange that folds out to seal the toilet drain, while a drain (or cup) plunger has a simple, flat rubber cup for sinks and tubs.
- Match the Tool to the Job: Always use a toilet plunger for toilets. You can sometimes use a drain plunger on a toilet, but it’s inefficient and often fails to create a proper seal.
- Seal is Everything: The success of plunging depends 100% on creating an airtight seal over the drain. The flange on a toilet plunger is designed specifically for the unique shape of a toilet outlet.
- Every Home Needs Both: For complete plumbing preparedness, invest in two separate plungers: one designated for toilets and one for all other drains. This is more hygienic and effective.
- Technique Matters: Proper plunging involves slow, deliberate strokes to move the clog, not frantic splashing. Cover the overflow drain in sinks and tubs for better pressure.
- Maintain Your Tools: Rinse plungers with hot water and disinfectant after use. Store them in a dedicated holder or bucket to dry, keeping them clean and ready for the next emergency.
Toilet Plunger vs Drain Plunger: Which One Do You Need?
You hear that dreaded sound. A gurgle. Water starts to rise. You have a clog. You run to the closet for your trusty plunger. But wait… is it the right plunger? Using the wrong one is like trying to hammer a nail with a screwdriver. You might get lucky. But you’ll probably just make a bigger mess.
This guide will end the confusion. We will break down the exact differences between a toilet plunger and a drain plunger. You will learn how to pick the right tool. You will learn how to use it like a pro. Let’s dive in and unclog the mystery once and for all.
The Champions: Meet Your Two Plungers
At first glance, all plungers look similar. A stick with a rubber cup. But look closer. The design of the cup is what makes all the difference.
Visual guide about Toilet Plunger vs Drain Plunger Which One Do You Need
Image source: expresssewer.com
The Toilet Plunger (The Flange Plunger)
This is your toilet’s best friend. The key feature is a second, softer rubber piece that extends from the bottom of the cup. This is called a flange. It looks like a smaller, internal cup or a tapered bell.
- Primary Job: Unclogging toilets exclusively.
- How it Works: The flange folds out. You insert it into the toilet drain hole. The flange fills the narrow drain passage. The main cup seals over the wider bowl opening. This creates a powerful, focused pressure system.
- Visual ID: Look for the extra soft, floppy piece of rubber inside the main cup.
The Drain Plunger (The Cup Plunger)
This is a generalist. It’s the classic plunger shape you probably picture. It has a simple, dome-shaped rubber cup with a hollow center.
- Primary Job: Unclogging sink drains, bathtub drains, and shower drains.
- How it Works: The flat rim seals against the flat surface around a sink or tub drain. The push-and-pull action creates pressure to dislodge hair, soap, and gunk.
- Visual ID: It looks like a simple red rubber cup on a stick. No extra inner piece.
Choosing Your Weapon: Which Plunger for Which Clog?
Now you know what they are. Let’s match them to the battle.

Visual guide about Toilet Plunger vs Drain Plunger Which One Do You Need
Image source: gopaschal.com
When to Grab the Toilet (Flange) Plunger
This one is simple. Use it only for toilets. The toilet drain has a unique curved trap and a specific outlet size. The flange is engineered to fit into that space perfectly. It creates the airtight seal you need to push force down the drain and not just splash water around.
Scenario: The water in your toilet bowl is rising or draining slowly. You see paper and… other stuff. This is a toilet plunger moment.
When to Grab the Drain (Cup) Plunger
This is your go-to for any flat-surface drain.
- Bathroom Sink: Clogged with hair and toothpaste.
- Kitchen Sink: Blocked by food scraps and grease (use it on one side at a time, covering the other drain).
- Bathtub/Shower: Full of hair and soap scum.
- Floor Drain: For basement or laundry room drains.
Important Tip: For sinks and tubs with an overflow hole (the little opening near the top of the basin), cover it with a wet rag before plunging. This ensures all the pressure goes down the main drain.
How to Plunge a Toilet Like a Pro
Using a flange plunger correctly is a skill. Follow these steps.
Visual guide about Toilet Plunger vs Drain Plunger Which One Do You Need
Image source: familyhandyman.com
Step 1: Prepare the Area
Put on some rubber gloves. Lay old towels or newspaper on the floor. Sometimes water can splash. Better safe than sorry.
Step 2: Insert and Seal the Plunger
Make sure the flange is extended. Gently insert the flange into the toilet drain. Lower the main cup so it completely covers the drain hole. The cup should be submerged in water. If the water level is low, add some from the sink to cover the cup. This is crucial for creating pressure.
Step 3: The Plunging Motion
Slow and steady wins the race. Don’t pump wildly.
1. Push down gently at first to push out any air and get a perfect seal.
2. Angle the stick slightly for better leverage.
3. Use firm, controlled pushes and pulls. The goal is to move the clog back and forth to break it up, not to blast it to China.
4. Do 10-15 strong pumps.
Step 4: Check and Repeat
After a set of pumps, pull the plunger away quickly. Watch the water. Does it drain swiftly? If so, success! Flush once to make sure. If not, repeat the process. A tough clog may take a few rounds.
How to Plunge a Sink or Tub Drain
The technique for a drain plunger is similar but adapted for a flat surface.
Step 1: Prep the Drain
Remove the sink strainer or pop-up stopper if you can. Clear any visible gunk from the drain. Plug the overflow hole with a wet rag. For a double kitchen sink, stuff a wet rag or use a sink stopper to seal the second drain.
Step 2: Add Water and Seal
You need enough water in the basin to cover the cup of the plunger by an inch or two. Fill it if needed. Place the plunger cup directly over the drain. Ensure the rim makes full, even contact all around.
Step 3: Plunge with Force
Use the same controlled motion: push down to expel air, then pump vigorously up and down for 20 seconds. The suction and pressure will work on the clog in the pipe below.
Step 4: Release and Test
Yank the plunger off. Listen for a gulping sound. Run hot water to see if the drain is clear. Repeat if necessary.
Troubleshooting: When Plunging Doesn’t Work
Sometimes, even with the right tool and technique, a clog is stubborn. Here’s what to try next.
For Toilets:
- Use a Toilet Auger (Closet Auger): This is the next logical step. It’s a specialized snake that curves to navigate the toilet trap without scratching the porcelain. It can hook and break up or retrieve the blockage.
- Check for Non-Flushable Objects: If you suspect a toy, wipe, or other object, an auger is your only safe tool. Never use chemical drain cleaners in a toilet. They can damage pipes and create toxic fumes, and they often don’t work on solid-object clogs.
For Sinks and Tubs:
- Try a Drain Snake or Zip-It Tool: These are designed to pull out hair clogs that are just out of reach. They are cheap and very effective for bathroom drains.
- Clean the P-Trap: The U-shaped pipe under the sink is a common clog spot. Place a bucket underneath, unscrew the clean-out plugs or the trap itself, and clear it out manually.
- Use a Chemical Cleaner (With Caution): As a last resort for grease or soap clogs, you can try a gel-based drain cleaner. Follow instructions exactly and never mix products. They are harsh on old pipes.
The Final Verdict: What Should You Buy?
So, which one do you need? The honest answer is both.
Every household should have a designated flange plunger for toilets and a separate cup plunger for other drains. It’s more hygienic and guarantees you have the right tool for any clog. Store them separately—a toilet plunger should live in a dedicated holder next to the toilet. A drain plunger can be kept under the kitchen or bathroom sink.
If you must choose only one, get the toilet plunger. While not ideal, you can use a flange plunger on a sink drain by folding the flange up inside the cup, effectively turning it into a cup plunger. The reverse is not true. A drain plunger will almost always fail on a toilet because it can’t seal.
You are now a plunging expert. You can identify the tools. You know the techniques. You can troubleshoot problems. Remember, the right plunger, used correctly, solves 90% of household clogs. It saves you money on plumbers and saves you from a huge headache. Go forth with confidence. Your drains don’t stand a chance.