Why broom finish concrete is best for driveways comes down to safety, durability, and cost. This finish adds texture to wet concrete using a broom, which improves traction and reduces slips. This guide explains what broom finish concrete is, why it is ideal for driveways, and how to install, maintain, and troubleshoot it for long-lasting results.
Contents
- 1 Key Takeaways
- 2 Introduction: Why broom finish concrete is best for driveways
- 3 What is broom finish concrete?
- 4 Why broom finish concrete is best for driveways
- 5 Planning your broom finish concrete driveway
- 6 Step 1: Prepare the base
- 7 Step 2: Place and level the concrete
- 8 Step 3: Finish the surface before brooming
- 9 Step 4: Apply the broom finish
- 10 Step 5: Cure and protect the driveway
- 11 Maintenance tips for broom finish driveways
- 12 Troubleshooting common broom finish concrete problems
- 13 Conclusion: Why broom finish concrete is best for driveways
- 14 Author
Key Takeaways
- Point 1: Broom finish concrete is best for driveways because it offers excellent traction and slip resistance, even when wet.
- Point 2: The broom finish process is simple, affordable, and easy to apply on most residential driveways.
- Point 3: Proper timing is critical; the broom must be used when the concrete is firm enough to hold texture but still plastic.
- Point 4: You can customize broom finish concrete with different broom types, patterns, and colors.
- Point 5: Good base preparation and correct curing are just as important as the broom finish itself.
- Point 6: Regular cleaning, sealing, and minor repairs will keep a broom finish driveway looking good for many years.
- Point 7: Understanding common mistakes and troubleshooting issues helps you avoid premature cracking, scaling, or uneven texture.
Introduction: Why broom finish concrete is best for driveways
When you plan a new driveway, you want something strong, safe, and good-looking. Many homeowners ask why broom finish concrete is best for driveways compared to smooth or decorative finishes. The answer is simple. Broom finish concrete gives your driveway a textured surface that improves traction and holds up to daily use.
In this guide, you will learn what broom finish concrete is, why broom finish concrete is best for driveways, and how to install it step by step. You will also see tips to avoid common mistakes and how to keep your driveway in top shape. By the end, you will know exactly how to get a driveway that is durable, practical, and attractive.
What is broom finish concrete?
Broom finish concrete is a standard concrete surface that is brushed with a broom while it is still fresh. The broom creates fine lines and grooves on the surface. These lines add texture and grip. This is the main reason why broom finish concrete is best for driveways, sidewalks, and patios.
Visual guide about Why broom finish concrete is best for driveways
Image source: 3dconcreteandgravel.com
The process is simple. After the concrete is placed and leveled, a broom is dragged across the surface in one direction. The type of broom, the pressure used, and the timing all affect the final look and feel. A light broom gives a subtle texture. A stiff broom gives a rougher, more slip-resistant finish.
Because it is easy, affordable, and effective, broom finish concrete is one of the most common choices for residential driveways. It balances function and cost better than many fancy decorative options.
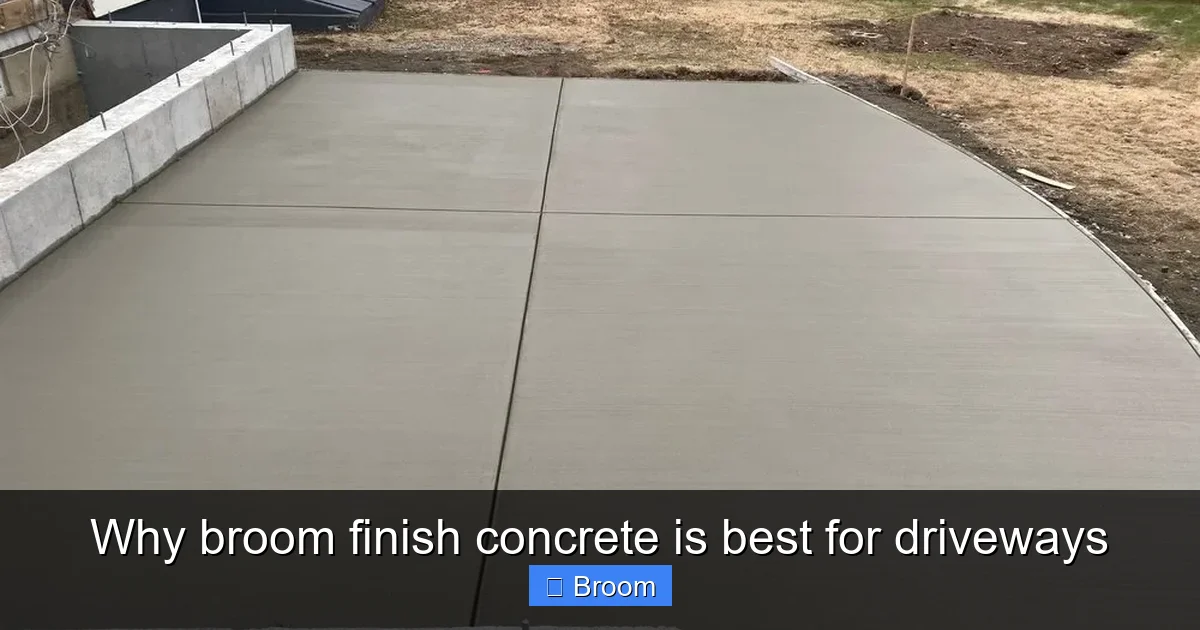
Why broom finish concrete is best for driveways
There are many reasons why broom finish concrete is best for driveways. Below are the main benefits that matter to most homeowners.

Visual guide about Why broom finish concrete is best for driveways
Image source: irp-cdn.multiscreensite.com
1. Superior traction and safety
Driveways get wet, icy, and dirty. A smooth concrete surface can become slippery and dangerous. Broom finish concrete is best for driveways because the fine ridges from the broom increase friction. This helps tires grip better and reduces slip risks for people walking, even in rain or light snow.
Families with kids, older adults, or anyone with mobility issues benefit from the safer surface. That extra texture can prevent falls and give you peace of mind.
2. Durability for daily vehicle traffic
Driveways must handle heavy loads, turning wheels, and constant use. Broom finish concrete is best for driveways because it uses standard concrete mixes that are strong and long-lasting when installed correctly. The broom texture does not weaken the slab; it only changes the surface pattern.
With a proper base, correct thickness, and good curing, a broom finish driveway can last decades. It stands up well to cars, trucks, and even light equipment.
3. Cost-effective and easy to install
Compared to stamped concrete or pavers, broom finish concrete is best for driveways when you want a budget-friendly option. The materials are simple, and the finishing technique does not require expensive tools or advanced skills.
Many concrete contractors are very familiar with broom finishes. That means lower labor costs and fewer chances of errors. For homeowners, this makes broom finish concrete one of the most cost-effective driveway choices.
4. Low maintenance with simple care
Another reason why broom finish concrete is best for driveways is its easy maintenance. The textured surface hides minor stains and wear better than a very smooth finish. Routine cleaning, occasional sealing, and small crack repairs are usually all you need.
You do not have to worry about weeds between joints like you do with pavers. You also avoid the high upkeep of some decorative surfaces that require special cleaners or frequent resealing.
5. Versatile appearance with simple customization
Some people think broom finish means boring gray concrete. That is not true. Broom finish concrete is best for driveways when you want a clean, classic look that you can still personalize. You can:
- Use colored concrete or integral pigments.
- Add borders with a different finish, such as smooth or stamped edges.
- Change the broom direction for visual interest.
- Choose fine or coarse broom textures.
This flexibility lets you match your driveway to your home’s style without losing the practical benefits.
Planning your broom finish concrete driveway
Before you pour anything, you need a solid plan. Careful planning is one more reason why broom finish concrete is best for driveways that last.
Measure and design the layout
Start by measuring the area where you want your driveway. Include the width, length, and any curves or parking pads. Think about:
- How many vehicles you will park.
- Space for turning and backing up.
- Access to the garage or street.
- Drainage and slope away from your home.
Most driveways need at least a small slope so water runs off. A typical slope is about 1/8 to 1/4 inch per foot away from the house.
Choose thickness and concrete strength
Broom finish concrete is best for driveways when the slab is thick enough and strong enough. For most homes:
- Thickness: 4 inches minimum for passenger vehicles; 5–6 inches if you expect heavier loads.
- Concrete strength: 3,000–4,000 psi is common for residential driveways.
- Reinforcement: Wire mesh, rebar, or fiber reinforcement helps control cracking.
Check permits and local codes
Many cities require permits for new driveways. Some areas have rules about thickness, slope, or distance from property lines. Check with your local building department before you start. This ensures your broom finish concrete driveway meets all requirements.
Step 1: Prepare the base
A strong base is one of the main reasons why broom finish concrete is best for driveways over the long term. Without a good base, even the best finish will crack or settle.
1.1 Clear and excavate the area
Remove grass, roots, old pavement, and topsoil from the driveway area. Excavate to a depth that allows for your base material plus the concrete thickness. For example, if you want 4 inches of base and 4 inches of concrete, you need to dig at least 8 inches down.
1.2 Install and compact the base material
Spread a layer of compactible gravel or crushed stone. A typical base is 4–6 inches thick. Use a plate compactor to compact the base in thin layers. A well-compacted base helps prevent future settling and cracking.
Check the slope as you go. The base should follow the same slope you want for the finished driveway.
1.3 Set up forms
Use straight 2×4 or 2×6 boards to create forms along the edges of the driveway. Secure them with stakes. Make sure the forms are level from side to side and follow the desired slope from front to back.
Good forms help you get a consistent thickness and a clean edge. This also makes it easier to apply a uniform broom finish later.
Step 2: Place and level the concrete
Now you are ready for the concrete. This is where timing and teamwork matter. The quality of the slab is a big part of why broom finish concrete is best for driveways.
2.1 Order the right mix
Order ready-mix concrete from a reputable supplier. Tell them it is for a driveway with a broom finish. Ask for the correct strength and slump (workability). Many installers use a moderate slump so the mix is workable but not too wet.
2.2 Pour the concrete
Have the truck discharge the concrete into the forms or into wheelbarrows if access is tight. Place the concrete evenly, starting at one end and working toward the other. Do not dump large piles in one spot and drag them long distances.
2.3 Screed and bull float
Use a straight board or a screed tool to level the concrete along the forms. Move the screed back and forth in a sawing motion while pulling it across the surface. This cuts high spots and fills low spots.
After screeding, use a bull float to smooth the surface and push larger aggregate slightly below the surface. This step prepares the slab for troweling and brooming.
Step 3: Finish the surface before brooming
Before you apply the broom finish, you need to do some basic finishing. This is where many people rush, but patience is one reason why broom finish concrete is best for driveways that look professional.
3.1 Edge and joint the slab
Use an edging tool along the forms to round the edges. This reduces chipping and gives a neat look. Then use a groover to cut control joints at regular intervals. These joints help control where cracks will form.
Typical spacing is 8–10 feet apart in both directions, or no more than 2–3 times the slab thickness in feet. For a 4-inch slab, that means joints every 8–12 feet.
3.2 Wait for the right brooming time
Timing is critical. Broom too early and the lines will wash out. Broom too late and the broom will drag and tear the surface. To see why broom finish concrete is best for driveways, you must get this step right.
A simple test is to press your finger on the surface. If you leave a slight mark about 1/8 inch deep, but no paste sticks to your finger, it is close to broom time. The surface should be firm but still plastic.
Step 4: Apply the broom finish
This is the key step that makes broom finish concrete stand out. How you broom the surface affects both appearance and safety. It is the main reason why broom finish concrete is best for driveways in wet or icy climates.
4.1 Choose the right broom
Use a concrete finishing broom with synthetic or horsehair bristles. The broom can be fine, medium, or coarse:
- Fine broom: Softer, lighter texture, good for patios and decorative areas.
- Medium broom: Common choice for most driveways.
- Coarse broom: Strong texture for maximum traction, useful in very wet or snowy areas.
4.2 Decide on broom direction
Most installers pull the broom perpendicular to the direction of traffic. This gives better grip for tires as they move up and down the driveway. You can also choose to broom at an angle for a more decorative look.
4.3 Broom the surface evenly
Attach a long handle to the broom so you can stand off the slab. Start at one edge and pull the broom in a straight line across the surface. Overlap each pass slightly so there are no gaps or darker lines.
Keep the pressure steady. Too much pressure creates deep, rough grooves. Too little pressure creates a weak texture. If you see clumps or drag marks, your timing may be off or the broom may be dirty. Rinse the broom as needed.
4.4 Check edges and transitions
Use a hand broom in tight areas along edges, steps, or around drains. Make sure the texture is consistent everywhere. This attention to detail is another reason why broom finish concrete is best for driveways that look clean and professional.
Step 5: Cure and protect the driveway
Even the best broom finish will fail if the concrete is not cured properly. Good curing is one of the hidden reasons why broom finish concrete is best for driveways that resist cracking and scaling.
5.1 Apply curing compound or water cure
After the broom finish has set enough to walk on gently, apply a curing compound or start water curing. Curing keeps moisture in the slab so it gains strength.
- Curing compound: Spray-on product that forms a thin film. Easy and common for driveways.
- Water curing: Lightly mist the surface or cover it with wet burlap or plastic sheeting for several days.
5.2 Protect from early traffic
Keep vehicles off the driveway for at least 7 days, and longer if possible. Foot traffic is usually fine after 24–48 hours, but check with your contractor. Early heavy loads can cause cracks or ruts that ruin the broom finish.
5.3 Seal the surface (optional but recommended)
After the concrete has cured for about 28 days, you can apply a breathable sealer. Sealing helps protect against stains, de-icing salts, and freeze-thaw damage. This helps explain why broom finish concrete is best for driveways that must endure harsh weather.
Maintenance tips for broom finish driveways
One more reason why broom finish concrete is best for driveways is that it is simple to maintain. A few habits will keep it looking and performing well for many years.
Regular cleaning
- Sweep or blow off leaves and debris.
- Wash with a garden hose and mild detergent as needed.
- Use a pressure washer on a low setting if there is heavy dirt, but do not hold the nozzle too close.
Avoid harsh chemicals
Do not use harsh acids or strong degreasers unless they are made for concrete and used as directed. Avoid using de-icing salts in the first winter, as they can damage young concrete.
Inspect and repair small cracks
Small hairline cracks are normal. If you see larger cracks, clean them and fill them with a concrete crack filler. This prevents water from entering and causing more damage. Quick repairs help keep broom finish concrete the best choice for driveways that stay solid over time.
Troubleshooting common broom finish concrete problems
Even though broom finish concrete is best for driveways, issues can still appear if steps are rushed or skipped. Here are some common problems and solutions.
Problem: Surface is too rough or too smooth
If the surface is very rough, the broom may have been too stiff or the pressure too heavy. If it is too smooth, the brooming may have been done too early or too lightly. In future projects, adjust broom type and pressure. For existing driveways, a light grinding can soften very rough areas.
Problem: Uneven or wavy broom lines
Uneven lines happen when the broom is not pulled straight or the surface is not consistent. To prevent this, use guide boards or snap chalk lines as visual guides. Always pull the broom in one steady motion, overlapping passes slightly.
Problem: Flaking or scaling surface
Scaling can be caused by poor curing, too much water in the mix, or early use of de-icing salts. This is why good curing is so important when broom finish concrete is used for driveways. Mild scaling can sometimes be treated with a thin overlay or resurfacer.
Problem: Cracking beyond control joints
All concrete cracks, but good planning reduces random cracks. If you see many random cracks, the slab may lack joints, have a poor base, or have dried too fast. For future work, improve base prep, add more joints, and cure properly. For existing cracks, seal them to prevent water damage.
Conclusion: Why broom finish concrete is best for driveways
Now you can see clearly why broom finish concrete is best for driveways. It offers excellent traction, strong durability, and a clean, classic look. The process is simple and cost-effective, yet the results are long-lasting when you follow the right steps.
By planning your layout, preparing a solid base, placing quality concrete, and applying a proper broom finish at the right time, you create a driveway that serves your home for many years. Add good curing and simple maintenance, and your broom finish concrete driveway will stay safe, attractive, and reliable in all seasons.
If you want a driveway that balances performance, safety, and budget, broom finish concrete is one of the best choices you can make.
🎥 Related Video: Broom finish concrete
📺 Concrete By Design