This guide explains the real difference between brooming vs sweeping, and how to choose the right method for every type of floor and mess. You’ll learn simple, step-by-step techniques, common mistakes to avoid, and pro tips to make your daily cleaning faster and easier. Use this how-to guide to keep your home cleaner with less effort and better results.
Contents
- 1 Key Takeaways
- 2 Brooming vs Sweeping: Key Differences and Best Uses
- 3 Understanding Brooming vs Sweeping
- 4 When to Use Brooming vs Sweeping
- 5 Choosing the Right Broom for the Job
- 6 How to Broom Indoors Step by Step
- 7 How to Sweep Large or Outdoor Areas
- 8 Tips to Improve Your Brooming vs Sweeping Technique
- 9 Common Mistakes and How to Fix Them
- 10 Troubleshooting Specific Brooming vs Sweeping Problems
- 11 Combining Brooming vs Sweeping with Other Cleaning Methods
- 12 Conclusion: Making the Most of Brooming vs Sweeping
- 13 Author
Key Takeaways
- Point 1: “Brooming” focuses on using a broom, while “sweeping” is the overall action of moving dirt and dust off a surface.
- Point 2: Brooming vs sweeping matters because different tools and motions work better on different floor types and mess sizes.
- Point 3: Soft-bristle brooming is best for fine dust indoors; stiff-bristle sweeping is ideal for outdoor and heavy debris.
- Point 4: Correct sweeping angles, short strokes, and controlled motions reduce dust clouds and protect your floors.
- Point 5: Choosing the right broom and sweeping method can cut cleaning time, protect your back, and improve air quality.
- Point 6: Regular brooming vs sweeping in high-traffic areas prevents dirt from scratching and dulling hard floors.
- Point 7: Combining brooming, sweeping, and vacuuming gives the deepest clean, especially for allergy-prone households.
Brooming vs Sweeping: Key Differences and Best Uses
Many people use the words “brooming” and “sweeping” like they mean the same thing. But when you look closer, brooming vs sweeping are not always identical. The difference matters when you want the cleanest floors in the shortest time.
In this guide, you will learn what brooming vs sweeping really means, when to choose one over the other, and how to do both the right way. You will get simple steps, easy tips, and clear examples. By the end, you will know exactly how to clean any floor with less effort and better results.
Understanding Brooming vs Sweeping
What Is Brooming?
Brooming is the act of using a broom to move dust, dirt, and debris off a surface. The focus is on the tool: the broom. When people say they are brooming, they usually mean they are cleaning with a broom only, often in short, controlled strokes.
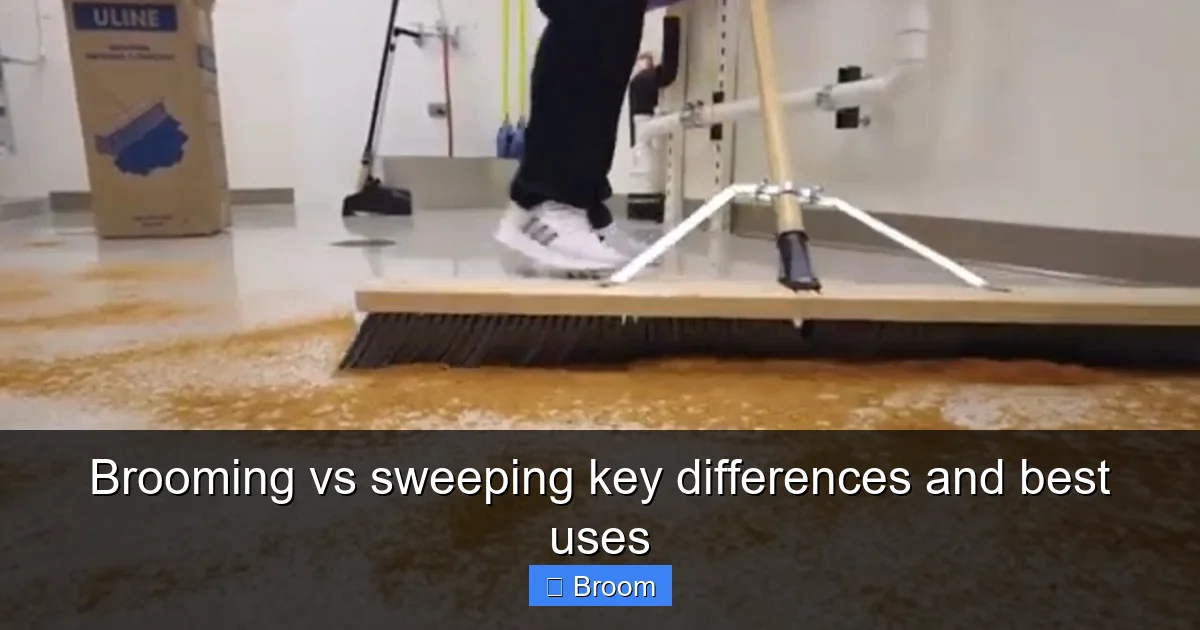
Visual guide about Brooming vs sweeping key differences and best uses
Image source: i.ytimg.com
Brooming is common in homes, offices, and indoor spaces. It works well on:
- Tile floors
- Wood and laminate floors
- Vinyl and linoleum
- Concrete or smooth garage floors
With brooming, the broom type matters a lot. Soft bristles, stiff bristles, angle brooms, and push brooms all change how effective your cleaning will be.
What Is Sweeping?
So, in simple terms of brooming vs sweeping:
- Brooming = cleaning with a broom specifically.
In everyday speech, the two overlap a lot. But when you choose tools and methods, it helps to think of brooming as focused broom use, and sweeping as the full cleaning motion and pattern.
Why the Difference Matters
At first, brooming vs sweeping may sound like a small detail. But this small detail can change your cleaning results. When you know the difference, you can:
- Pick the right broom for the job
- Use the best sweeping motion for each floor
- Reduce dust clouds and sneezing
- Protect delicate surfaces from scratches
- Save time and energy every time you clean
Now, let’s look at how to choose between brooming vs sweeping for different spaces in your home.
When to Use Brooming vs Sweeping
Best Uses for Brooming
Brooming works best when you need more control and gentle cleaning. You usually choose brooming when:

Visual guide about Brooming vs sweeping key differences and best uses
Image source: askmehelpdesk.com
- You are cleaning indoor floors with fine dust.
- You need to reach corners, under furniture, or along baseboards.
- You have delicate floors that scratch easily, like hardwood.
- You want to avoid raising too much dust into the air.
Typical brooming jobs include:
- Daily kitchen floor cleaning
- Quick tidy-ups in hallways and entryways
- Light dust removal in bedrooms and living rooms
- Cleaning around pets’ food bowls and litter areas
Best Uses for Sweeping
- You are cleaning outdoor spaces, like patios or driveways.
- You have a lot of debris, like leaves, sand, or gravel.
- You are using a push broom or yard broom.
- You need to clear a wide area quickly.
Typical sweeping jobs include:
- Garage and workshop floors
- Sidewalks, porches, and decks
- Basements and storage areas
- Construction or renovation dust and debris
In short, for brooming vs sweeping:
- Use brooming for precision and indoor control.
- Use sweeping for coverage and heavy debris.
Choosing the Right Broom for the Job
To make brooming vs sweeping truly effective, you need the right broom. The wrong broom can leave dirt behind, scratch your floors, or make you work much harder.
Soft-Bristle Brooms
Soft-bristle brooms are best for indoor brooming. They trap fine dust and hair without scratching your floor.
Use soft-bristle brooms on:
- Hardwood and laminate
- Tile and smooth stone
- Vinyl and linoleum
They are ideal when you want gentle, quiet cleaning and less dust flying into the air.
Stiff-Bristle Brooms
Stiff-bristle brooms are better for outdoor sweeping and rough surfaces. They scrape and move heavier debris like sand, soil, and small stones.
Use stiff-bristle brooms on:
- Concrete driveways and sidewalks
- Garage floors
- Decks and patios
They are stronger, but can be too harsh for delicate indoor floors.
Angle Brooms
Angle brooms are great for detailed brooming vs sweeping in tight spaces. Their slanted bristles reach corners and edges easily.
Use angle brooms when you need to:
- Clean along baseboards
- Reach under cabinets and appliances
- Get into corners and narrow gaps
Push Brooms
Push brooms are wide and are perfect for large-scale sweeping. They cover more floor with each pass.
Use push brooms for:
- Warehouses and workshops
- Long hallways
- Garages and big patios
Push brooms make sweeping faster on big surfaces, but they are less precise than a small broom.
How to Broom Indoors Step by Step
Now let’s walk through how to broom properly. This will help you get the most from brooming vs sweeping on indoor floors.
Step 1: Prepare the Area
Remove small items from the floor, like toys, shoes, and mats. If you can, pull chairs away from the table. This gives you a clear path for brooming and sweeping.
Close windows and doors if outside wind is strong. This stops dust from blowing back into the room.
Step 2: Choose the Right Broom
Pick a soft-bristle or angle broom for most indoor brooming vs sweeping. Make sure the broom is clean. If bristles are clogged with hair or dust, pull it out or cut it away.
Step 3: Start from the Edges
Always begin brooming along the walls, baseboards, and corners. Dirt collects there first. Use short, controlled strokes to pull dust away from the edges and toward the center of the room.
Keep the broom at a slight angle so more bristles touch the floor. This helps trap fine dust.
Step 4: Work in Small Sections
Divide the room in your mind into small sections. Broom one section at a time, moving dirt toward a central pile. This is where brooming vs sweeping technique really matters.
Use gentle pressure. Pressing too hard bends the bristles too much and scatters dust instead of collecting it.
Step 5: Form a Neat Dust Pile
As you broom, guide all the dirt into one or two piles. Keep the piles away from air vents and doorways so they do not blow around.
Use short, final strokes around the pile to gather stray bits. Do not rush this step. A neat pile makes cleanup easier.
Step 6: Use a Dustpan Correctly
Place the dustpan flat on the floor, with the lip tight against the surface. Hold it steady with your foot or hand.
Use the broom to sweep the pile into the dustpan with short, firm strokes. If dirt slips under the dustpan, press it down more firmly or tilt it slightly toward the pile.
Step 7: Dispose and Finish
Empty the dustpan into a trash bag or bin. Tap the dustpan gently to release stuck dust. If needed, broom one last time to catch anything left behind.
For a deeper clean, you can follow brooming with a quick mop or damp cloth on sticky spots.
How to Sweep Large or Outdoor Areas
Outdoor sweeping is different from indoor brooming vs sweeping. You deal with bigger debris, rougher surfaces, and sometimes wind and moisture.
Step 1: Pick the Right Sweeping Tool
For outdoor sweeping, choose a stiff-bristle broom or a wide push broom. For decks with narrow gaps, a slightly softer outdoor broom may work better.
If you are sweeping a very large area, like a long driveway, a push broom will save time and energy.
Step 2: Clear Large Obstacles
Pick up large items by hand first. This includes branches, rocks, and trash. Big items can block your broom and slow you down.
Step 3: Sweep with the Wind, Not Against It
When possible, sweep in the same direction the wind is blowing. This stops dust from blowing back into your face and onto already cleaned areas.
In brooming vs sweeping outdoors, wind direction can make a big difference in how clean the area looks.
Step 4: Use Long, Steady Strokes
For sweeping big spaces, use long, even strokes. Push or pull the broom in straight lines. Overlap each pass slightly so you do not miss spots.
On rough concrete, apply a bit more pressure so the bristles reach into tiny cracks and grooves.
Step 5: Gather Debris into Rows or Piles
Instead of one big pile, it can be easier to make long rows of debris. Then push those rows into a few larger piles at the edge of the area.
This method makes sweeping more efficient and keeps debris under control, especially when dealing with leaves or gravel.
Step 6: Bag or Bin the Debris
Use a large dustpan, shovel, or yard scoop to collect the piles. Place the debris into bags, bins, or a compost pile, depending on what you have swept up.
Check the area once more for small leftover patches, then give it a final light sweep if needed.
Tips to Improve Your Brooming vs Sweeping Technique
Use the Right Angle
Keep the broom at about a 45-degree angle to the floor. This lets more bristles touch the surface and pick up more dust. Too upright and you push dirt around. Too flat and the broom drags awkwardly.
Short Strokes vs Long Strokes
Indoors, use shorter strokes for better control and less dust in the air. Outdoors, longer strokes cover more ground and help move heavier debris.
This is one of the main technique differences in brooming vs sweeping for different spaces.
Mind Your Posture
Stand upright, keep your back straight, and let your arms and legs do the work. Do not bend over too much. If the handle is too short, consider a broom with a longer handle to protect your back.
Clean Your Broom Regularly
Dusty, clogged bristles do not work well. Every week or so, take the broom outside and tap it gently against a wall or post. You can also comb the bristles with an old comb or gloved fingers.
For plastic bristles, you can rinse them with warm water and mild soap, then let them dry fully before using again.
Match Frequency to Traffic
High-traffic areas like kitchens and entryways may need daily brooming vs sweeping. Low-traffic rooms might only need it a few times a week.
Regular light brooming is easier and more effective than waiting for a big, heavy clean.
Common Mistakes and How to Fix Them
Mistake 1: Using the Wrong Broom
Using a stiff outdoor broom on delicate floors can cause scratches. Using a very soft broom on rough concrete does almost nothing.
Fix: Keep at least two brooms: one soft indoor broom and one stiff outdoor broom. Use each where it works best.
Mistake 2: Sweeping Too Fast
Fast, wild sweeping throws dust into the air and leaves streaks of dirt behind. It also tires you out faster.
Fix: Slow down and use controlled strokes. Focus on guiding the dirt, not attacking it.
Mistake 3: Ignoring Corners and Edges
Corners and edges collect the most dust, but are easy to skip. Over time, they build up grime and look dirty even after you clean.
Fix: In every brooming vs sweeping session, start with corners, edges, and under furniture before doing the open areas.
Mistake 4: Not Emptying the Dustpan Fully
If you leave dust in the dustpan, it falls out the next time you use it. This makes your cleaning feel pointless.
Fix: Tap the dustpan gently into the trash and wipe it with a dry or damp cloth if needed.
Mistake 5: Only Brooming, Never Vacuuming
Brooming vs sweeping is great, but it does not remove all fine dust from carpets, rugs, or cracks.
Fix: Combine brooming and sweeping with regular vacuuming and occasional mopping for a deeper clean.
Troubleshooting Specific Brooming vs Sweeping Problems
Problem: Dust Keeps Coming Back After You Sweep
This often happens when you sweep too quickly or use a very dry broom on very fine dust. The dust floats in the air and settles again.
Solution: Use slower strokes. Lightly mist the floor with water from a spray bottle before brooming, especially on tile or concrete. Do not soak the floor, just dampen it slightly to weigh down the dust.
Problem: Hair and Fur Stick to the Floor or Broom
Pet hair and long human hair can wrap around bristles and stay on the floor even after sweeping.
Solution: Use a rubber broom or a broom with electrostatic bristles if possible. For regular brooms, stop halfway through and pull hair off the bristles. You can also lightly mist the floor first to help hair clump together.
Problem: Lines of Dirt Left Behind the Broom
If you see thin lines of dirt after each pass, your broom may be worn out or not flat against the floor.
Solution: Check that all bristles touch the floor. Replace very worn brooms. Adjust your angle and use slightly more pressure.
Problem: Back or Shoulder Pain After Sweeping
Pain means your broom is the wrong size or your posture is off.
Solution: Use a broom with a longer handle so you do not need to bend. Switch hands from time to time to share the work. Take short breaks during big sweeping jobs.
Combining Brooming vs Sweeping with Other Cleaning Methods
For the cleanest home, brooming vs sweeping should be part of a simple routine, not the only step.
- Broom, then vacuum: Broom first to gather big debris, then vacuum to remove fine dust and allergens.
- Broom, then mop: After brooming or sweeping, mop to remove sticky spots and spills.
- Broom, then spot clean: Use a damp cloth or sponge on stains that do not come up with brooming alone.
This layered approach gives you a deeper, longer-lasting clean.
Conclusion: Making the Most of Brooming vs Sweeping
Understanding brooming vs sweeping helps you clean smarter, not harder. Brooming focuses on using the right broom with controlled strokes, especially indoors on delicate floors. Sweeping is the broader action, often used outdoors or on large areas with heavier debris.
When you match the right broom, the right motion, and the right method to each space, you save time and protect your floors. With the simple steps and tips in this guide, you can turn brooming vs sweeping into an easy, effective part of your daily routine. Cleaner floors, less dust, and less effort—that is the power of knowing how to broom and sweep the right way.