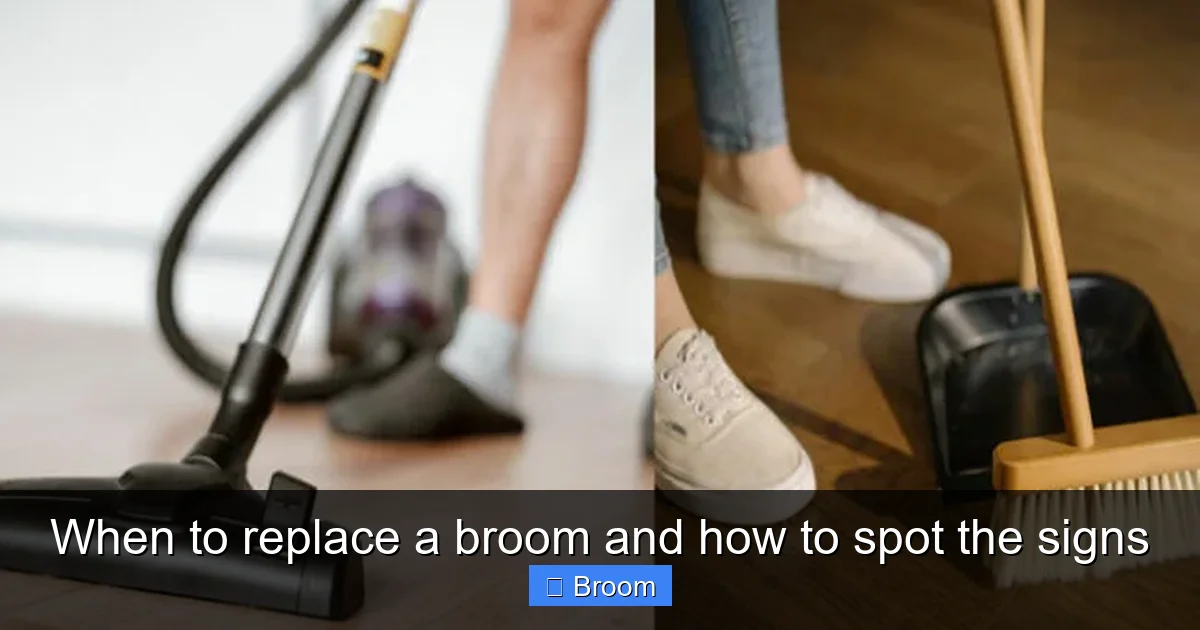
Knowing when to replace a broom can save you time, effort, and frustration while cleaning. This guide explains how to spot worn bristles, loose handles, hygiene problems, and other warning signs that your broom is past its best. You will also learn how to extend your broom’s life and choose the right time and type of replacement for your home.
Contents
- 1 Key Takeaways
- 2 Introduction: Why Knowing When to Replace a Broom Matters
- 3 How Long Does a Broom Usually Last?
- 4 Step 1: Inspect the Bristles
- 5 Step 2: Examine the Handle and Broom Head
- 6 Step 3: Check for Hygiene and Odor Issues
- 7 Step 4: Notice How the Broom Feels While You Sweep
- 8 Step 5: Decide: Clean, Repair, or Replace?
- 9 How to Extend the Life of Your New Broom
- 10 Troubleshooting Common Broom Problems
- 11 Conclusion: Make Replacing a Broom Part of Your Cleaning Routine
- 12 Author
Key Takeaways
- Point 1: Replace a broom when bristles are frayed, bent, or uneven, because it will stop picking up dust and dirt properly.
- Point 2: Loose or cracked handles and broom heads are safety risks and clear signs it is time for a new broom.
- Point 3: Bad smells, stains, or stuck debris in the bristles mean the broom may be unhygienic and should often be replaced.
- Point 4: A broom that makes cleaning feel slower or harder than usual is likely worn out, even if it still looks okay.
- Point 5: Regular cleaning, drying, and correct storage can extend a broom’s life and delay replacement.
- Point 6: Different broom types wear out at different speeds, so indoor, outdoor, and specialty brooms will not all need replacing at the same time.
- Point 7: Having a simple replacement schedule in mind helps you budget and keeps your home consistently clean.
Introduction: Why Knowing When to Replace a Broom Matters
A broom seems simple. You grab it, sweep, and you are done. But over time, even the best broom wears out. When a broom is past its prime, it stops doing its job. You push and push, yet dust and crumbs stay on the floor. You may even think your home is getting dirtier, not cleaner.
That is why it helps to know when to replace a broom and how to spot the signs
By the end, you will be able to look at any broom in your home and quickly decide: keep it, fix it, or replace it.
Before you can decide when to replace a broom, it helps to know what is normal. There is no single answer, because it depends on how often you sweep, what you sweep, and the broom type. But you can use some general time frames as a guide.
Visual guide about When to replace a broom and how to spot the signs Image source: vacuumist.com
These are just rough ranges. The real key is to watch for the signs of wear. When to replace a broom should always be based on how well it still cleans, not only on the calendar.
How Long Does a Broom Usually Last?
Typical Lifespan by Broom Type
Factors That Shorten a Broom’s Life
- Very frequent use: Sweeping several times a day wears bristles faster.
- Rough floors: Concrete, stone, and outdoor surfaces grind down bristles.
- Wet sweeping: Using a broom on wet messes can bend or rot bristles.
- Bad storage: Leaving the broom standing on its bristles or outside in the rain shortens its life.
If any of these apply to you, you will need to think about when to replace a broom more often than someone who sweeps only once or twice a week on smooth indoor floors.
Step 1: Inspect the Bristles
The bristles are the heart of any broom. When they fail, the broom fails. So the first step in deciding when to replace a broom is a close look at the bristles.

Visual guide about When to replace a broom and how to spot the signs
Image source: vacmasterguide.com
Check for Fraying and Splitting
Lay the broom on its side and look at the tips of the bristles.
- If the tips are neat, straight, and fairly even, the broom is still doing fine.
- If many bristles are frayed, split, or fuzzy, they will not trap dust well.
- If the ends look like a messy fringe, the broom is near the end of its life.
A few damaged bristles are normal. But when more than half look worn, it is usually time to replace the broom.
Look for Bent or Curved Bristles
Stand the broom upright and look at the bristle shape.
- Healthy bristles point mostly straight down with a slight fan shape.
- Worn bristles curve sharply to one side or flare out so far they barely touch the floor.
- If the broom leans heavily on one side of the bristle block, it will leave dirt behind.
If you see extreme bending or a permanent curve, that is a clear sign of when to replace a broom. Bent bristles rarely bounce back, even if you try to reshape them.
Check Bristle Length and Evenness
Place the broom on a flat floor and gently press down.
- All bristles should touch the floor at roughly the same time.
- If some are much shorter, the broom will leave “streaks” of dust behind.
- If the center is worn down more than the edges, the broom may only sweep with the sides.
When the bristle length is very uneven, the broom will feel “scratchy” and weak. This is another good sign that it is time to replace a broom.
Check for Clumped or Stuck Debris
Look closely for hair, threads, or fluff locked in the bristles.
- Try combing the bristles with your fingers or a comb.
- If you cannot remove the buildup, the broom will not sweep smoothly.
- Clumped bristles can scratch delicate floors and spread dirt instead of trapping it.
Sometimes a deep clean can fix this. But if the debris has been there long and the bristles are stiff or glued together, it may be more hygienic to replace the broom.
Step 2: Examine the Handle and Broom Head
When to replace a broom is not only about the bristles. The handle and broom head matter for safety and comfort. A damaged handle can even cause injury.
Check for Cracks, Splinters, and Bends
Run your hand along the handle, from top to bottom.
- For wood handles, feel for splinters, rough spots, or cracks.
- For metal or plastic handles, look for bends, dents, or stress marks.
- If the handle feels weak, wobbly, or flexes too much, it may snap under pressure.
If you see deep cracks or feel sharp splinters, that is a strong sign to replace the broom. Sanding may help small splinters, but big damage is not worth the risk.
Test the Connection Between Handle and Head
Hold the broom head with one hand and the handle with the other. Gently twist.
- A solid broom will feel tight and secure.
- If the head wiggles, spins, or rattles, the connection is loose.
- Sometimes you can tighten a screw or twist the handle back in. But if it loosens again quickly, it is a sign the broom is worn out.
A loose head makes sweeping harder and can cause sudden slips or jerks. When tightening no longer holds, it is time to replace the broom.
Look for Rust, Mold, or Warping
Inspect any metal parts, screws, or ferrules.
- Rust can weaken joints and stain floors.
- Mold or mildew on the head or handle is a hygiene issue, especially in damp homes.
- Warped plastic heads may not let bristles sit flat on the floor.
If rust, mold, or warping is severe, cleaning might not fix it. In those cases, when to replace a broom is easy to answer: replace it now.
Step 3: Check for Hygiene and Odor Issues
A broom touches dust, food crumbs, pet hair, and sometimes spills. Over time, it can become a home for germs. When to replace a broom is often about cleanliness, not just wear.
Smell the Broom
Yes, it sounds odd, but it works. Hold the broom head a short distance from your nose and take a light sniff.
- If it smells neutral or only slightly dusty, it is likely fine.
- If it smells musty, sour, or rotten, that is a sign of trapped moisture or bacteria.
- Strong odors that stay after washing usually mean the broom is too far gone.
If the smell makes you wrinkle your nose, it is probably time to replace the broom, especially for indoor or kitchen use.
Look for Stains and Discoloration
Check the bristles and broom head for dark patches, sticky spots, or strange colors.
- Light discoloration from dust is normal.
- Dark stains, greasy marks, or dried food bits are not.
- If stains will not wash out, they can harbor bacteria and odors.
In areas like kitchens or bathrooms, a stained broom is not worth the risk. This is a clear sign of when to replace a broom to keep your space hygienic.
Consider Where and How You Use It
Think about the messes you use the broom for.
- If you often sweep up food spills, pet accidents, or damp messes, germs build up faster.
- Garage and workshop brooms may pick up oils, chemicals, or sharp debris.
- Using the same broom indoors and outdoors spreads dirt and bacteria.
If a broom has been used for very dirty or risky messes, consider replacing it sooner. Sometimes, when to replace a broom is “right after a big, nasty job.”
Step 4: Notice How the Broom Feels While You Sweep
You can learn a lot just by paying attention while you clean. When to replace a broom is often clear from how it feels in your hands.
Is Sweeping Taking Longer Than Before?
Think about your usual cleaning routine.
- Are you going over the same spot many times to pick up crumbs?
- Does dust seem to float away instead of gathering in a neat pile?
- Do you finish and still see grit on the floor?
If sweeping feels slower and less satisfying, the broom may be worn out even if it does not look terrible. This is a practical sign of when to replace a broom: when it stops saving you time.
Does the Broom Drag or Skip?
Pay attention to how the broom moves.
- A good broom glides smoothly and quietly across the floor.
- A worn broom may drag, chatter, or skip, especially on smooth surfaces.
- You may feel vibration in the handle or hear more scratching sounds.
These sensations mean the bristles are not making even contact with the floor. When that happens, replacing the broom will make cleaning easier and more pleasant.
Does the Handle Feel Uncomfortable?
Notice how your hands feel after sweeping.
- If the handle feels rough, sticky, or too thin, you may grip harder.
- Extra tension can cause hand or wrist strain.
- A broom that once felt fine but now feels awkward may be warped or damaged.
Comfort matters. When to replace a broom is also when it starts to cause discomfort or small pains during normal use.
Step 5: Decide: Clean, Repair, or Replace?
After you inspect your broom, you have three choices: clean it, repair it, or replace it. The right choice depends on what you found.
When Cleaning Is Enough
You can usually just clean the broom if:
- Bristles are mostly straight, with only light dust buildup.
- There is some hair or fluff stuck, but it comes out with a comb.
- There is a mild odor that fades after washing and drying.
To clean:
- Shake or tap the broom outside to remove loose dust.
- Use scissors or a comb to remove hair and threads.
- Wash the bristles in warm, soapy water, rinse well, and hang to dry.
Regular cleaning can delay when to replace a broom by several months.
When a Small Repair Is Worth It
Repair may help if:
- The head is slightly loose but has a screw you can tighten.
- The handle is fine but the head is a replaceable type.
- Only a few bristles are damaged, and you can trim them without affecting the rest.
If a quick fix makes the broom solid and safe again, you can keep using it. But if repairs do not hold, that is your answer for when to replace a broom.
When It Is Time to Replace the Broom
You should replace a broom when:
- Bristles are badly frayed, bent, or uneven.
- The handle is cracked, splintered, or badly bent.
- The head is loose and will not stay tight.
- There is strong odor, mold, or stains that do not wash out.
- Sweeping feels slow, tiring, or ineffective.
If two or more of these are true, do not wait. Knowing when to replace a broom and acting on it will make your cleaning routine smoother and your home cleaner.
How to Extend the Life of Your New Broom
Once you buy a new broom, a few simple habits can delay when to replace a broom next time. Good care saves money and keeps your broom working well.
Store the Broom Properly
- Hang it by the handle so the bristles do not carry the broom’s weight.
- If you must stand it up, lean it with the handle in a corner and bristles off the floor.
- Keep it in a dry, cool place, away from rain, damp, or strong sun.
Proper storage stops bristles from bending and keeps the handle from warping or rotting.
Use the Right Broom for the Right Job
- Use a soft indoor broom on smooth floors like tile, laminate, or hardwood.
- Use a stiffer outdoor broom or push broom on concrete, decks, and driveways.
- Keep a separate broom for very dirty areas like garages or pet areas.
Using the right tool means less wear and tear. It also makes it easier to decide when to replace a broom, because each broom does one type of job.
Clean the Broom Regularly
- Shake out loose dust after each use.
- Comb out hair and fluff at least once a week if you have pets.
- Wash bristles every month or two, or more often for kitchen and bathroom brooms.
A clean broom works better, smells better, and lasts longer. This simple habit will push back the time when you need to replace a broom.
Troubleshooting Common Broom Problems
Sometimes you are not sure if a problem means it is time to replace the broom. Here are some common issues and what they usually mean.
Problem: Broom Leaves a Dust Line Behind
You sweep, and a thin line of dust or crumbs remains.
- Possible causes: Bristles are too stiff for the floor, ends are worn down, or bristles are clogged with fine dust.
- Try this first: Clean the bristles, then test again.
- If it continues: The bristle tips are likely worn. This is often when to replace a broom.
Problem: Broom Sheds Bristles
You notice bristles on the floor after sweeping.
- Possible causes: Old broom, poor-quality glue, or damage from moisture or rough use.
- Try this first: Gently tug a few bristles. If many pull out easily, the broom is failing.
- Likely solution: Replace the broom, as shedding will only get worse.
Problem: Handle Unscrews While Sweeping
You sweep, and the handle keeps twisting loose.
- Possible causes: Worn threads, cheap connector, or over-tightening in the past.
- Try this first: Tighten firmly, maybe add a bit of tape around the threads to improve grip.
- If it still loosens: This is a sign of when to replace a broom or at least the handle.
Problem: Broom Smells Even After Washing
You cleaned it, but the odor stays.
- Possible causes: Deep bacterial growth, old food particles, or mold in the bristle base.
- Try this first: Soak bristles in a mild bleach or vinegar solution, rinse, and dry fully.
- If smell remains: For hygiene, it is time to replace the broom.
Conclusion: Make Replacing a Broom Part of Your Cleaning Routine
A broom is a simple tool, but it has a big job. When it is worn out, every sweep takes more time and effort. Knowing when to replace a broom and how to spot the signs helps you keep your home cleaner with less work.
Watch the bristles, the handle, and the hygiene of your broom. Pay attention to how it feels when you sweep. When you see clear signs of wear, do not wait. Replacing a broom at the right time is a small step that makes your whole cleaning routine smoother, faster, and more effective.
With good care and smart timing, you will always have a broom that actually helps, instead of one that just pushes dirt around.