Timing is everything when you broom concrete. This guide explains how to test the surface, read the bleed water, and choose the perfect moment to pull the broom for a clean, durable texture. You’ll learn step-by-step methods, tools to use, common mistakes to avoid, and pro tips to get a safe, slip-resistant broom finish on driveways, walkways, patios, and more.
Contents
- 1 Key Takeaways
- 2 Introduction: Why Timing Matters When You Broom Concrete
- 3 Understanding Broom Finish Concrete
- 4 Key Factors That Control When to Broom Concrete
- 5 Tools You Need for a Proper Broom Finish
- 6 Step-by-Step: How to Prepare for a Broom Finish
- 7 How to Test When Broom Concrete Is Ready
- 8 Step-by-Step: How to Broom Concrete for Best Traction and Finish
- 9 Pro Tips for a Perfect Broom Finish
- 10 Troubleshooting: What If You Broom Too Early or Too Late?
- 11 Aftercare: Curing and Protecting Your Broom Finish
- 12 Practical Examples: When to Broom Different Projects
- 13 Conclusion: Mastering the Moment You Broom Concrete
- 14 Author
Key Takeaways
- Point 1: The best time to broom concrete is after bleed water disappears and the surface holds a light footprint without filling in.
- Point 2: Temperature, wind, and sun affect when broom concrete should be finished, so you must watch the slab, not the clock.
- Point 3: Use a soft broom for fresh concrete and pull it in straight, even passes for a uniform texture and strong traction.
- Point 4: Overworking or brooming too early can weaken the surface and cause flaking, dusting, or ugly lines.
- Point 5: Broom direction matters; pull the broom perpendicular to the main traffic path for better grip.
- Point 6: Proper curing after you broom concrete is essential to prevent cracking and to lock in a durable finish.
- Point 7: If you miss the ideal window, you can still improve traction with light rewetting, special brooms, or surface treatments.
Introduction: Why Timing Matters When You Broom Concrete
When you place a new slab, the final texture is one of the most important steps. A smooth finish can look nice, but it is also slippery when wet. That is why many pros use a broom finish on driveways, sidewalks, patios, and pool decks. The big question is simple: when broom concrete for best traction and finish?
This guide walks you through the full process. You will learn how to read the concrete, how to test the surface, and how to decide the exact moment to pull the broom. You will also learn what tools to use, how to move the broom, and how to fix common mistakes. By the end, you will know exactly when broom concrete and how to do it right for a safe, long-lasting surface.
Understanding Broom Finish Concrete
Before you learn when broom concrete, it helps to know what a broom finish really does. A broom finish is made by dragging a special concrete broom over the surface after it has been floated and troweled. This creates small ridges in the surface. These ridges give better traction and help water drain off.
Visual guide about When broom concrete for best traction and finish
Image source: dundeedig.com
People choose a broom finish for many reasons:
- Safety: It reduces slips on driveways, entries, ramps, and pool decks.
- Durability: A good broom finish can hide minor flaws that show on a smooth finish.
- Low glare: It cuts down on shine and glare from the sun.
- Easy to maintain: It is simple to clean and seal as needed.
To get all these benefits, you must know exactly when broom concrete. Too early or too late, and the finish will not perform as it should.
Key Factors That Control When to Broom Concrete
There is no single clock time that always works. When broom concrete depends on several changing factors. You must watch the slab itself and adjust to the conditions.

Visual guide about When broom concrete for best traction and finish
Image source: concretevancouver.net
1. Bleed Water
After you place and screed concrete, water rises to the surface. This is bleed water. You must never broom concrete while bleed water is still present. If you broom too early, you trap water and weaken the top layer. This can lead to scaling and dusting later.
The first rule for when broom concrete is simple: wait until all bleed water has evaporated and the surface looks dull, not shiny or wet.
2. Surface Firmness
Even after bleed water is gone, the surface may still be too soft. If you broom concrete while it is very soft, the bristles dig too deep and leave harsh, uneven grooves. You may also pull up paste and small stones.
You need the surface to be firm enough to support light pressure. This is why pros use the footprint and finger tests, which we will cover later. These tests tell you exactly when broom concrete is ready.
3. Weather Conditions
Weather has a huge effect on when broom concrete should be finished:
- Hot, dry, or windy days: Concrete sets much faster. The window for brooming is shorter.
- Cool or cloudy days: Concrete sets slower. You may wait longer before you broom concrete.
- Direct sun on dark forms or base: Edges may firm up faster than the center.
On hot or windy days, plan ahead. Have tools ready and enough help on site. When broom concrete in these conditions, you must move quickly but carefully.
4. Mix Design and Slab Thickness
Rich mixes with more cement, or mixes with accelerators, will set faster. Thicker slabs also hold heat and may set differently than thin overlays. When broom concrete, always ask your ready-mix supplier about the set time for the mix you are using. Use this as a guide, but still watch the surface closely.
Tools You Need for a Proper Broom Finish
Before you think about when broom concrete, make sure you have the right tools ready. Once the surface is at the ideal stage, you will not have time to go shopping.
- Concrete broom: A broom with soft, durable bristles designed for fresh concrete. Often attached to a long handle or bull-float style pole.
- Magnesium float or bull float: For bringing paste to the surface and smoothing before brooming.
- Steel trowel (optional): For edges or a slightly tighter surface before brooming.
- Edger and groover: To cut joints and clean edges before you broom concrete.
- Extension handles: To reach across the slab without stepping on the fresh surface.
- Water spray bottle or fine mister: For very light rewetting if the surface gets too dry before you broom.
Have all these tools at the slab before you place the concrete. This way, when broom concrete is ready, you can move straight into the finishing steps.
Step-by-Step: How to Prepare for a Broom Finish
Step 1: Place and Screed the Concrete
Place the concrete evenly in the forms. Use a screed board or power screed to strike off the surface to the correct height. Your goal here is a flat, level base for later finishing.
Step 2: Bull Float the Surface
Right after screeding, use a bull float or magnesium float. This pushes down coarse aggregate and brings a thin layer of paste to the top. Work in long, smooth passes. Do not overwork the surface. At this stage, you are not deciding when broom concrete yet; you are just setting up a smooth base.
Step 3: Let Bleed Water Rise and Evaporate
After bull floating, step back and let the concrete rest. Bleed water will rise to the surface and form a thin, shiny layer. This can take 10 minutes to over an hour, depending on conditions.
Do not trowel, do not edge, and do not broom concrete while you see bleed water. Let it evaporate naturally. If you try to push bleed water into the surface, you weaken the top layer.
How to Test When Broom Concrete Is Ready
Once the surface looks dull and bleed water is gone, it is time to test the firmness. This is the key step in deciding when broom concrete for the best finish.
The Footprint Test
The footprint test is simple and very effective.
- Lightly step on the surface at the edge or in a low-visibility spot.
- Watch how deep your footprint goes.
For ideal brooming:
- Your footprint should be about 1/8 inch deep, not more than 1/4 inch.
- The edges of your footprint should not crumble or collapse.
- The surface should not flow back and fill in the print.
If your foot sinks deeper or the surface flows back, it is too early to broom concrete. Wait a little longer and test again.
The Finger Test
You can also use your finger:
- Press your finger lightly into the surface.
- If you leave a shallow mark and a bit of paste on your finger, the surface is near ready.
- If your finger sinks easily and paste oozes up, wait longer.
- If it is hard to make a mark at all, you may be getting late.
Use both the footprint and finger tests. These two simple checks are the best guide for when broom concrete should be finished.
Step-by-Step: How to Broom Concrete for Best Traction and Finish
Step 1: Complete Edging and Jointing First
Before you broom concrete, finish your edges and control joints.
- Run an edger along all forms to create clean, rounded edges.
- Cut control joints with a groover or early-entry saw (if using a saw, do it later as directed by the manufacturer).
If you broom concrete before edging and jointing, you will disturb the broom lines later.
Step 2: Light Troweling or Floating (If Needed)
Some finishers like to run a light trowel or float over the surface just before they broom concrete. This tightens the paste and evens out any small ridges from earlier steps. Keep the pressure light. You do not want a hard, slick steel-troweled finish. You just want a uniform base.
Step 3: Choose Broom Direction
Think about how people will walk or drive on the slab. For best traction, you should broom concrete perpendicular to the main direction of travel. This gives shoes and tires more grip.
For example:
- On a driveway, pull the broom across the width, not up and down the slope.
- On a sidewalk, pull the broom across the path, not along it.
Step 4: Start Brooming at the Right Time
Once bleed water is gone and your tests show the surface is firm but still workable, you can broom concrete.
- Attach the broom to a handle or pole long enough to reach across the slab.
- Stand at one edge and pull the broom toward you in a straight, steady motion.
- Keep even pressure on the broom so the lines are uniform.
Do not push the broom back and forth. Instead, pull in one direction, then lift and move back to the starting point for the next pass.
Step 5: Overlap Passes Slightly
As you broom concrete across the slab, each pass should overlap the last by about one inch. This prevents gaps and ensures a consistent texture. Watch the surface from a low angle as you work. You should see even, parallel lines.
Step 6: Adjust Pressure and Speed
The look and grip of the finish depend on how hard and how fast you broom concrete.
- Lighter pressure: Finer lines, smoother feel, still good traction.
- More pressure: Deeper grooves, stronger grip, more visible texture.
For most driveways and walks, a medium, even pressure works best. Move at a steady pace so the lines do not wobble. If you see the broom dragging stones or tearing the surface, wait a few minutes and try again. The concrete may still be a bit too soft.
Pro Tips for a Perfect Broom Finish
When broom concrete, a few small details make a big difference in the final look and performance.
- Keep the broom clean: Rinse the bristles often to remove paste buildup. A dirty broom can leave clumps and streaks.
- Work with the set: If the sun or wind is drying one area faster, broom that area first.
- Use the right broom: Soft bristles for new, fresh concrete; stiffer bristles only if the surface has firmed more than expected.
- Check from different angles: Step back and look across the slab. Uneven lines show up better at a low angle.
- Avoid walking on finished areas: Plan your path so you do not step on sections after you broom concrete.
Troubleshooting: What If You Broom Too Early or Too Late?
Problem 1: Broomed Too Early
If you broom concrete too early, you may see:
- Very deep, rough grooves.
- Surface tearing or paste piling up in front of the broom.
- Fine aggregate (small stones) dragged and exposed.
What to do:
- Stop brooming right away.
- Let the surface rest for a few minutes.
- Lightly float or trowel the damaged area to smooth it.
- Test again and broom concrete once the surface is firmer.
Problem 2: Broomed Too Late
If you wait too long when broom concrete, you may find the broom barely makes any lines. The surface may be too hard, and the broom just skims over it.
What to do:
- Lightly mist the surface with clean water. Do not soak it.
- Use a broom with stiffer bristles and increase pressure.
- Work in smaller sections and move quickly.
If the concrete is fully set, you cannot create a true broom finish. In that case, consider adding traction later with a surface treatment, such as a textured sealer or non-slip additive.
Problem 3: Uneven or Wavy Lines
Uneven lines happen when pressure changes during brooming or when the broom jumps over small ridges.
What to do:
- Right away, re-broom the affected area with lighter, even pressure.
- Make sure the broom bristles are clean and not clogged with paste.
- Keep your body and arms steady, and let the broom glide.
Aftercare: Curing and Protecting Your Broom Finish
Knowing when broom concrete is only part of the job. Proper curing is just as important for a strong, durable surface.
Start Curing Soon After Brooming
Once you broom concrete and are happy with the texture, start curing as soon as the surface can handle it.
- Use a curing compound (spray-on) designed for exterior concrete, or
- Keep the slab moist with light water misting and cover with curing blankets or plastic sheeting, as recommended.
Curing helps slow down moisture loss. This reduces cracking and makes the surface stronger.
Protect from Early Damage
Fresh broomed concrete is still fragile. For the first few days:
- Keep foot traffic off the slab as long as the contractor or mix supplier suggests (often at least 24 hours).
- Keep vehicles off for at least a week, or as directed.
- Avoid dragging heavy items across the surface.
Good protection in the first week will keep the broom lines sharp and clean.
Sealing the Surface
After the concrete has cured (often 28 days, or as recommended), you can apply a sealer. A quality sealer will:
- Protect against stains and freeze-thaw damage.
- Help keep the broom finish clean.
- Enhance color if you used integral color or a stain.
Choose a sealer with a slip-resistant additive if the area is prone to getting wet, such as pool decks or exterior steps.
Practical Examples: When to Broom Different Projects
Driveways
On a driveway, traction is critical. When broom concrete on a driveway, aim for a medium to coarse texture. Broom perpendicular to the slope so tires grip better. Because driveways are large, plan your pour so you can broom concrete in sections before each area sets too much.
Sidewalks and Walkways
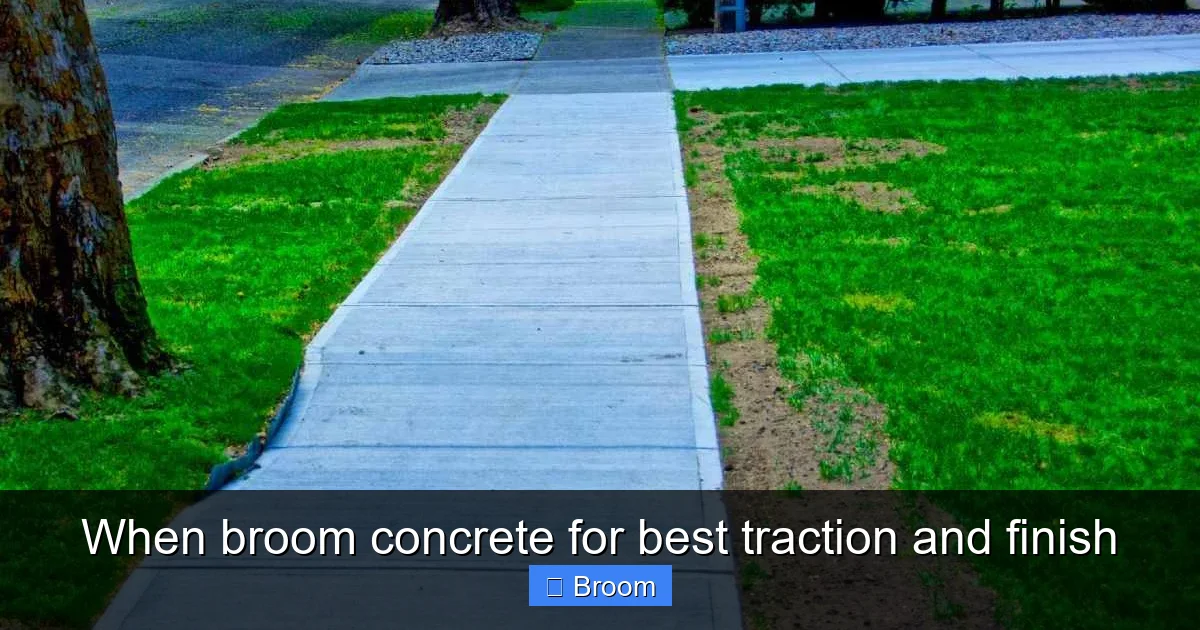
For sidewalks, a fine to medium broom finish is usually enough. People walk in many directions, but it is still best to broom across the path. When broom concrete on long walks, watch for shaded sections that may set slower than sunny spots.
Patios and Pool Decks
Patios and pool decks often need a balance of comfort and grip. You do not want lines so rough that they hurt bare feet. When broom concrete in these areas, use lighter pressure and softer bristles for a fine, even texture. Check the surface often so you hit the sweet spot between too soft and too hard.
Conclusion: Mastering the Moment You Broom Concrete
To get the best traction and finish, you must know exactly when broom concrete. Do not trust the clock. Trust the concrete. Wait until bleed water is gone, then use the footprint and finger tests to judge firmness. Broom in straight, even passes with the right pressure and direction. Protect and cure the slab so your work lasts.
With these steps and tips, you can create safe, attractive broom finishes on driveways, walks, patios, and more. Each project and each day is a little different, but once you learn to read the surface, you will always know when to broom concrete for the best possible result.